
Review Assigned Trips
You can click on Trips and then upcoming trips to view all the assigned trips to the driver.
Click on the "Arrow ➡️" button as shown below, which gives quick details of the trip, such as trip time, Trip miles, deadhead miles, and other information as shown below. You can also find load details like dispatcher notes, seal #, reference, etc., as shown in Image 2.
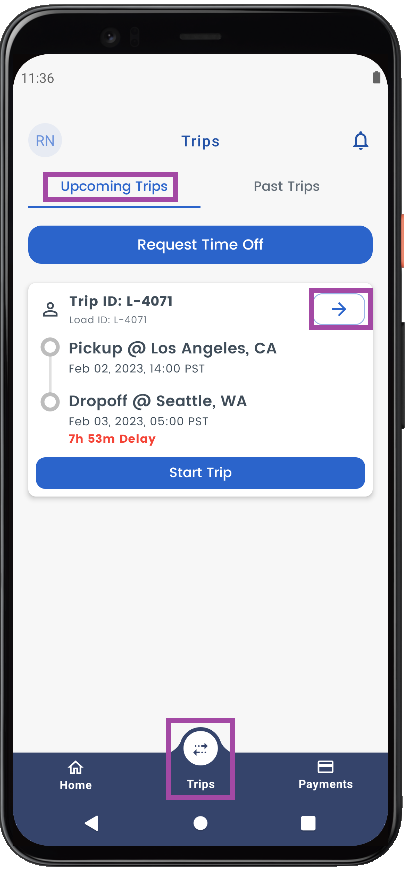
Image 1
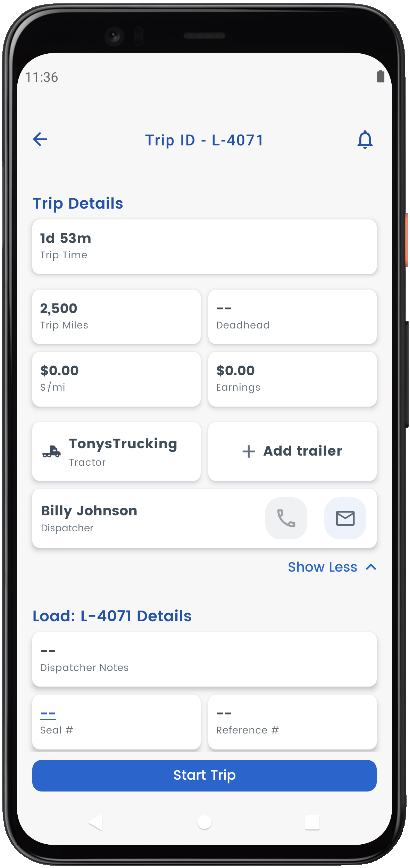
Image 2
You can scroll down to view Stops, under which you will have Pickup and Drop-off Locations and any other stops in between if any.
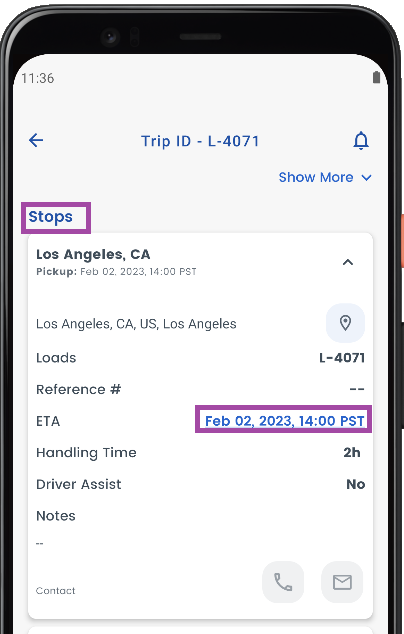
Image 3
To view an optimized plan for any stop, you can click on the ETA of that stop as shown above to see the detailed step-by-step plan for the trip along with ETA and Violation.
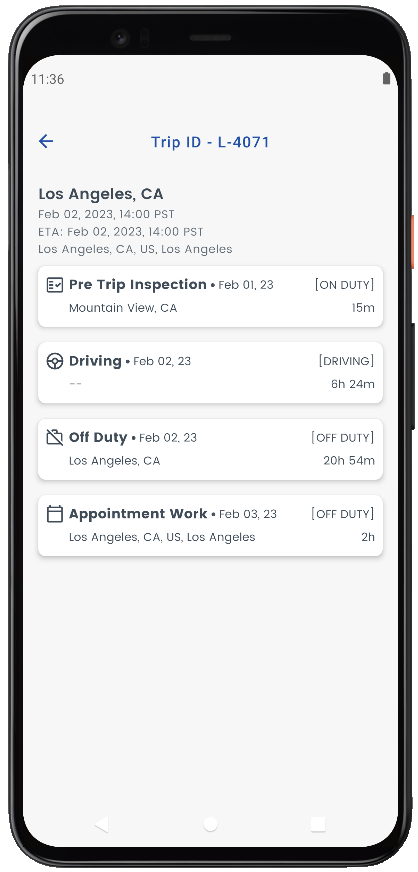
Image 4
Scroll further down to see Documents and Receipts and click on the arrow button as shown below to upload a new document or receipt or view existing uploaded documents or receipts.
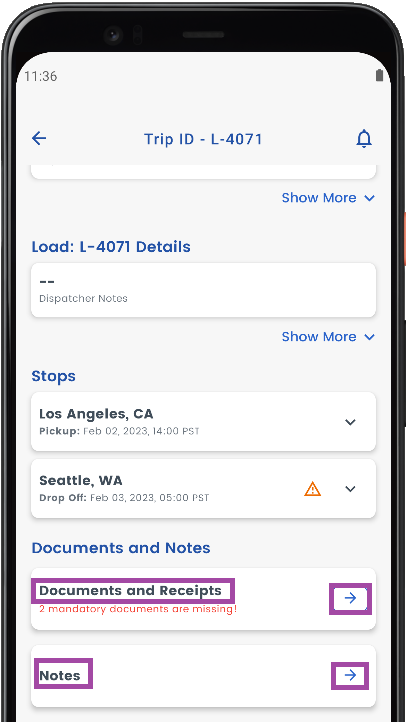
Image 5
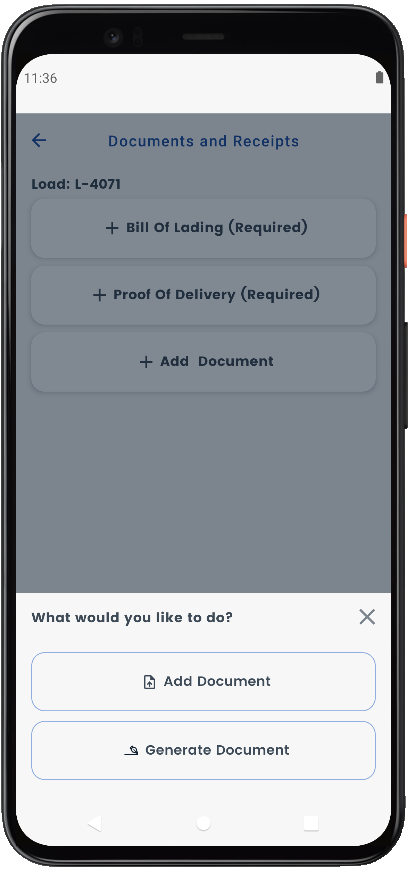
Image 6
You can also click on the Notes section, as shown in Image 5, to add any Notes which will be visible to the Dispatcher.
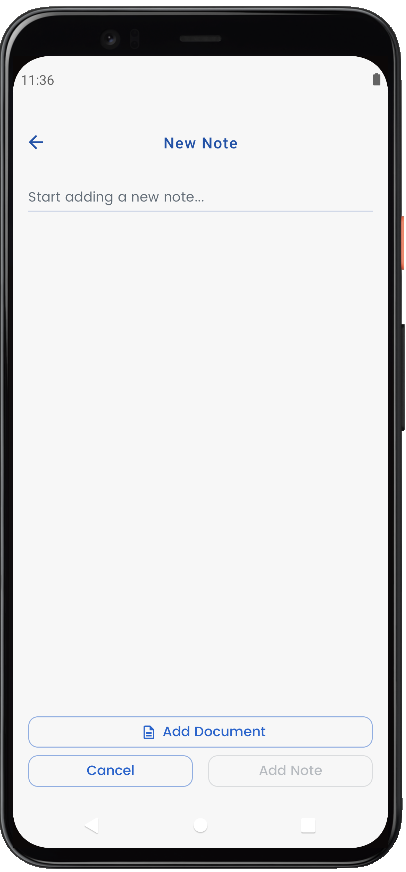
Image 7
Update Trip Progress
The app's home screen displays the current trip assigned to the driver.
You can start the load by tapping on the "Start Trip" button.
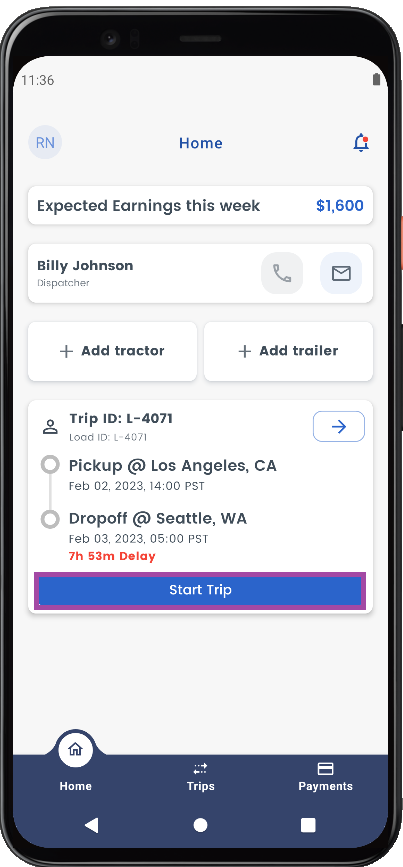
Image 8
The top section displays the ongoing activity; in this case, it is En route to pick up.
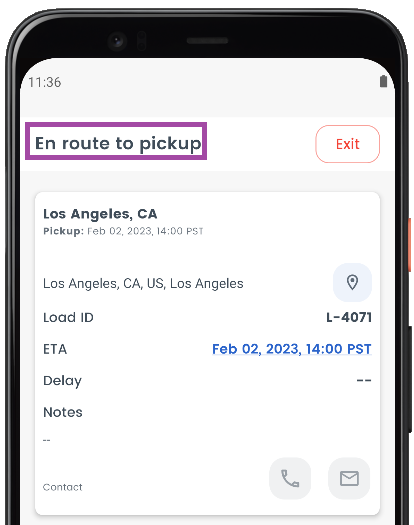
Image 9
The central part of the screen shows the address, the appointment window, and the calculated ETA for the stop.
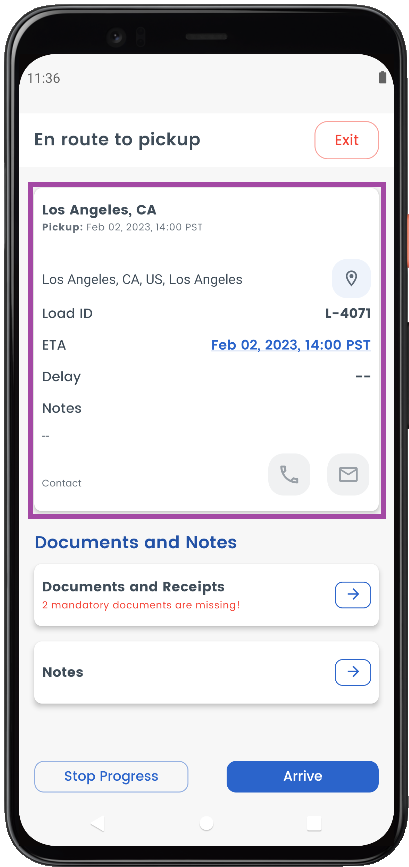
Image 10
The bottom section allows the driver to register for the completion of an activity.
To mark the driver's arrival at a stop, tap on "Arrive"; the system records the arrival date and time information internally.

Image 11
Tap on "Start" to begin loading and unloading activity.
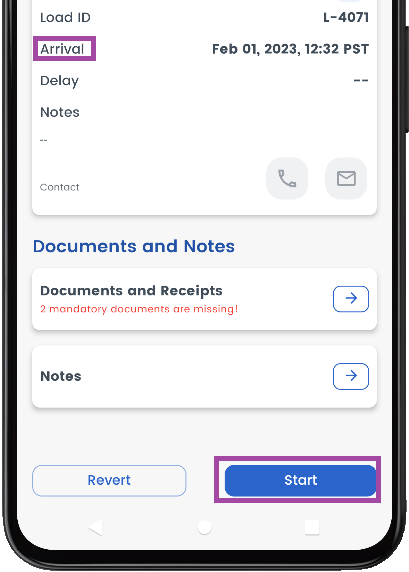
Image 12
To register the completion of a loading and unloading activity, tap "Complete."
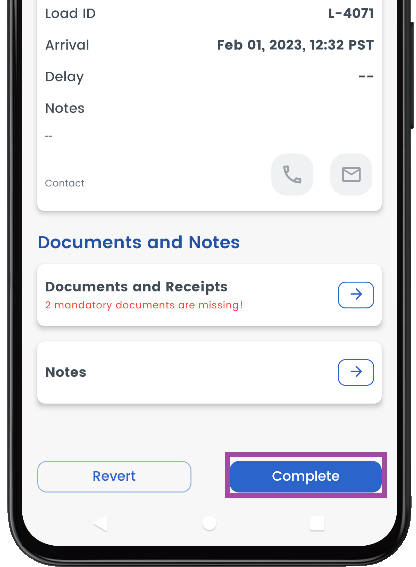
Image 13
You can tap the "Depart" button to indicate the departure towards the next stop.
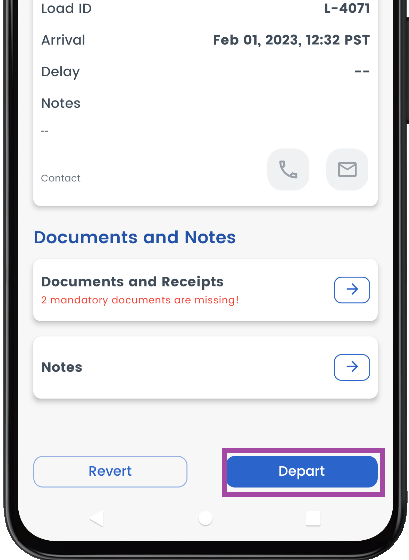
Image 14
The same procedure is repeated at the drop-off location.
You can only depart from the Drop-off location if you upload all the mandatory documents of the load, like Proof of Delivery and Bill of Lading.
You can see the depart button in the drop-off is greyed out since one mandatory document is missing, as shown below. Click on the arrow button adjacent to it to upload the document.
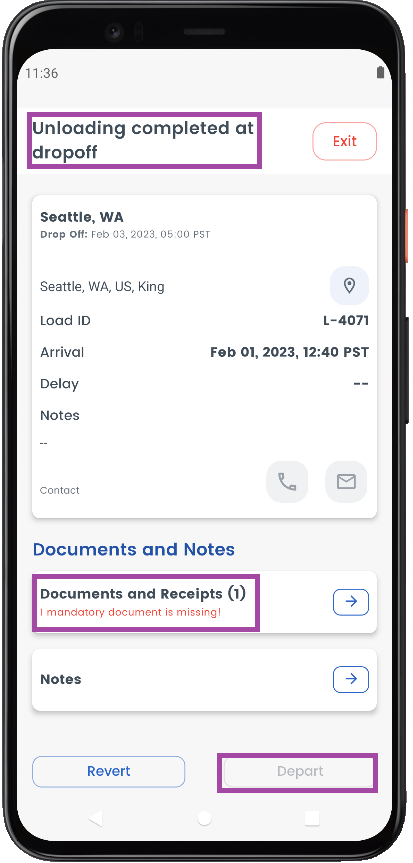
Image 15
Check the required missing document and upload the document as shown below. In this example, Proof of Delivery is missing.
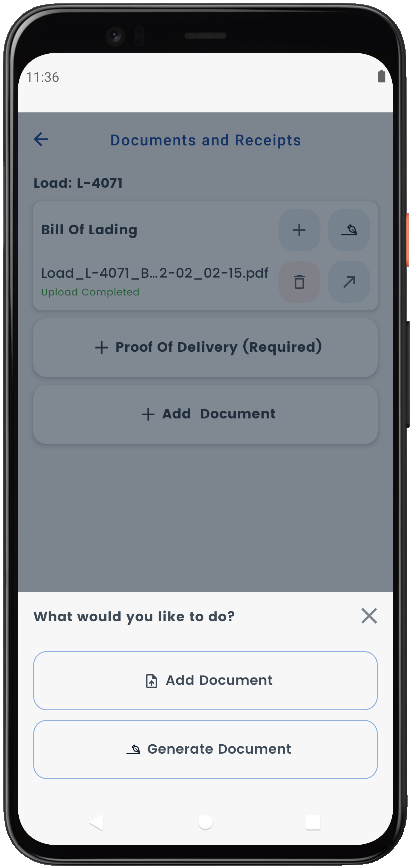
Image 16
As no mandatory documents are missing, you can see Depart button not being greyed, as shown below, which is not the case in Image 15.
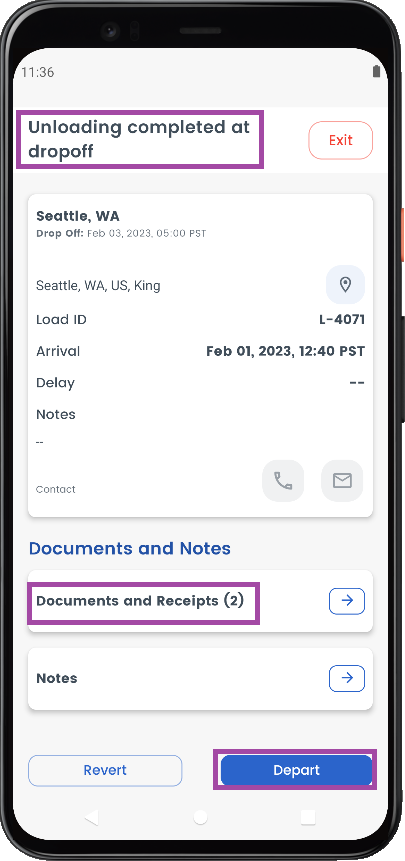
Image 17
Once you click Depart in the drop-off as shown above, the trip will be completed, which can be seen in Completed Trips (Trips> Completed Trips)