In this article
Overview
LoadOps has direct integration with Apex Capital which allows you to conveniently sync invoices and related documents from LoadOps into a Factoring company.
If you do not use Apex, you can still leverage the factoring integration with other providers to quickly email invoices and supporting load documents to your added factoring company.
To add a factoring company other than Apex, go to Settings > Integrations > click the Finance tab > click the Apex option from the list, fill out the required fields, and click Add. From now on, any invoice associated with a factored load will have your factoring provider’s information on the invoice for them to pay.
If you do use Apex, please follow the instructions below to set up your integration:
Once the invoices and documents are synced with Apex, you can create a schedule on the Apex portal by adding the invoices synced.
integrating Apex factoring with LoadOps is a four-step process:
- Add factoring company
- Activate API integration
- Map customers between Apex and LoadOps
- Map your driver with a funding account (Optional)
Add Other Factoring Company
Go to Settings > Integrations > Financials and click on Other Factoring Company.
Please note the two fields below and add the details accordingly:
- Display Name
- This is the name on the factoring card within the integrations section
- Name on Documents
- This is the name that goes on the invoice or other documentation
Provide all the details of the factoring company in the form and click Add.
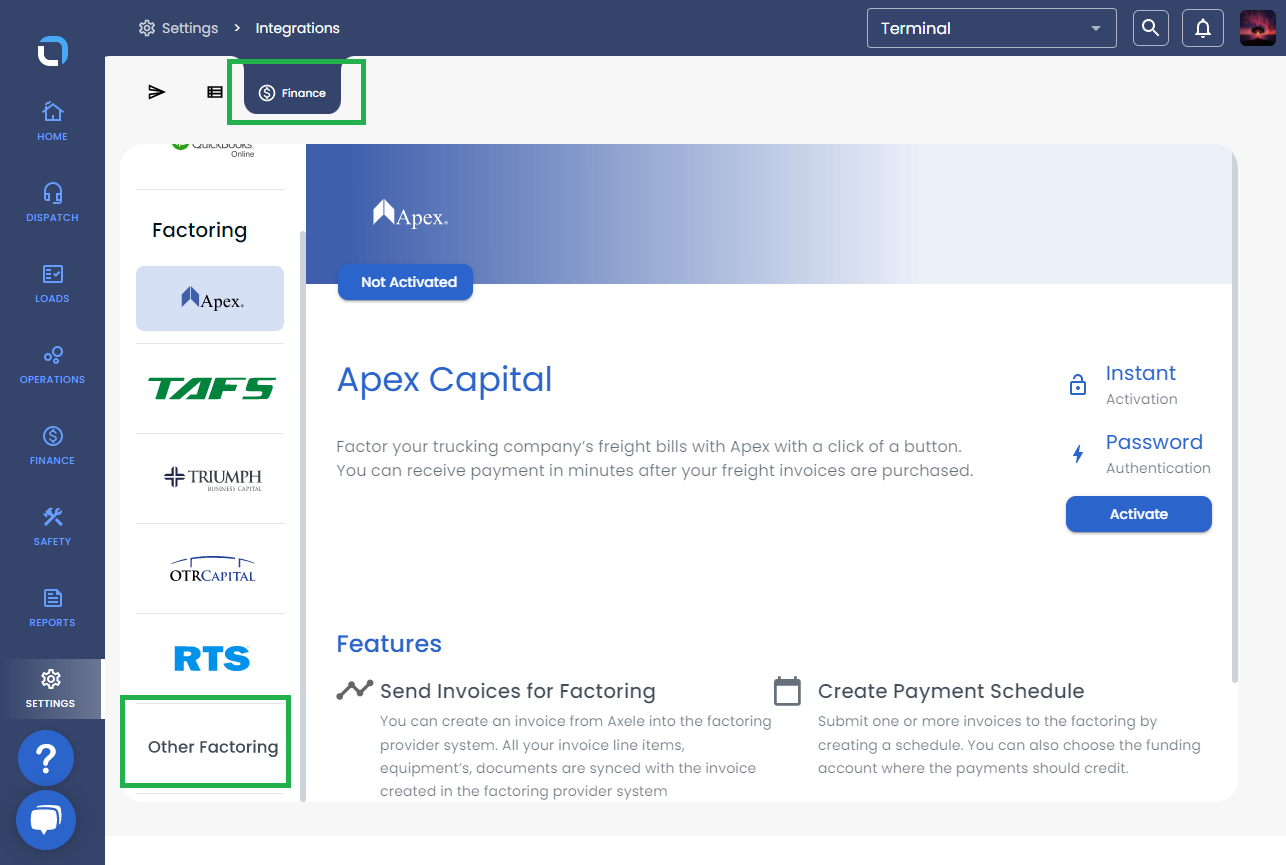
Image-1
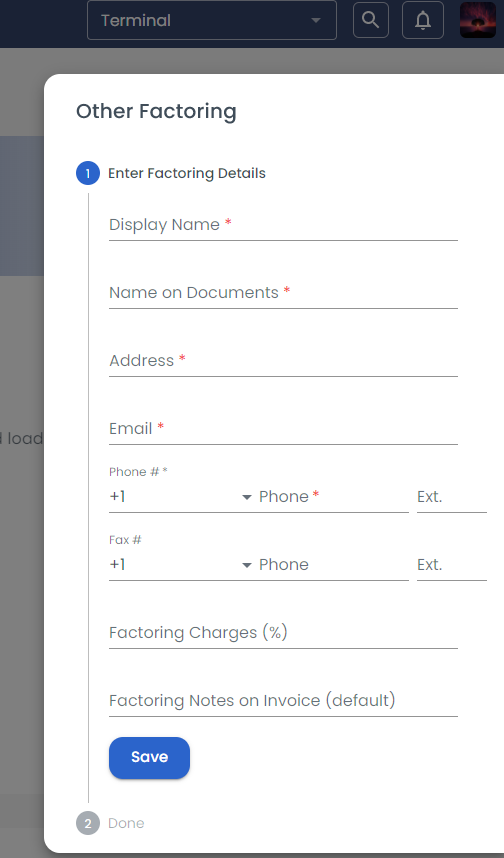
Image-2
Activate API Integration for Apex
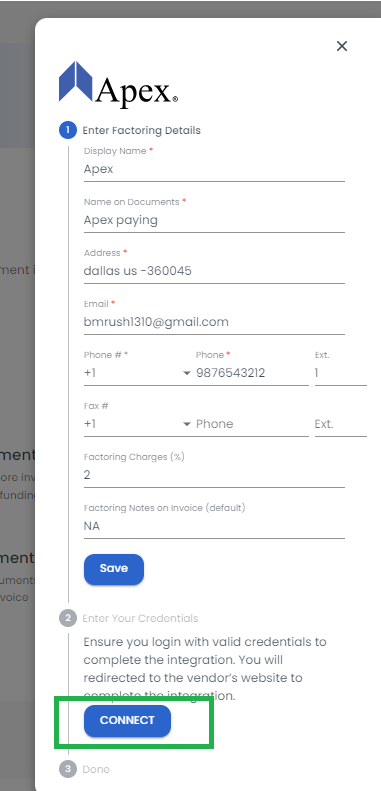
Once the factoring company card is added, click on the Connect button on the factoring card added as shown below
Create a dedicated Apex account for the API integration. You may need to reauthenticate on LoadOps every time you use the same integration account for accessing the Apex portal.
This will take you to the Apex portal and will prompt you to enter your user credentials.
Upon successful authentication on the Apex portal, you will then be redirected back to LoadOps.
Map Customers Between Factoring company and LoadOps
Once your factoring company is successfully API integrated, you must map your customers that are in LoadOps to the associated customer in your Apex portal.
To map the customers between both systems, click on ‘Manage Customer Mapping’ on the factoring card. This will bring up the following screens. Each customer you plan to use with this integration must be mapped individually.
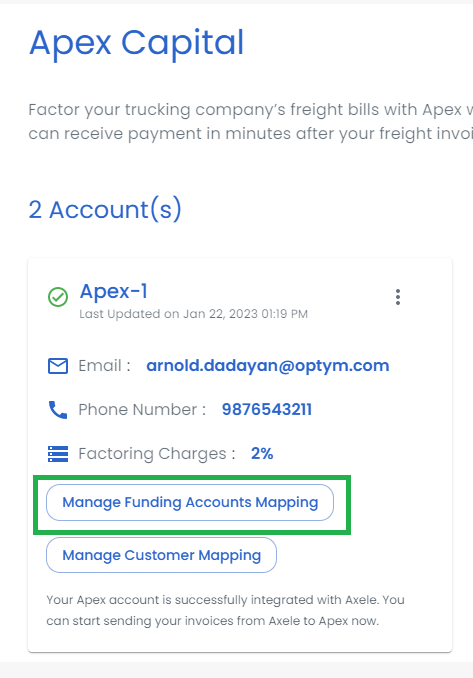
You cannot sync an invoice from LoadOps into Apex if the invoicing customer is not mapped between both systems.
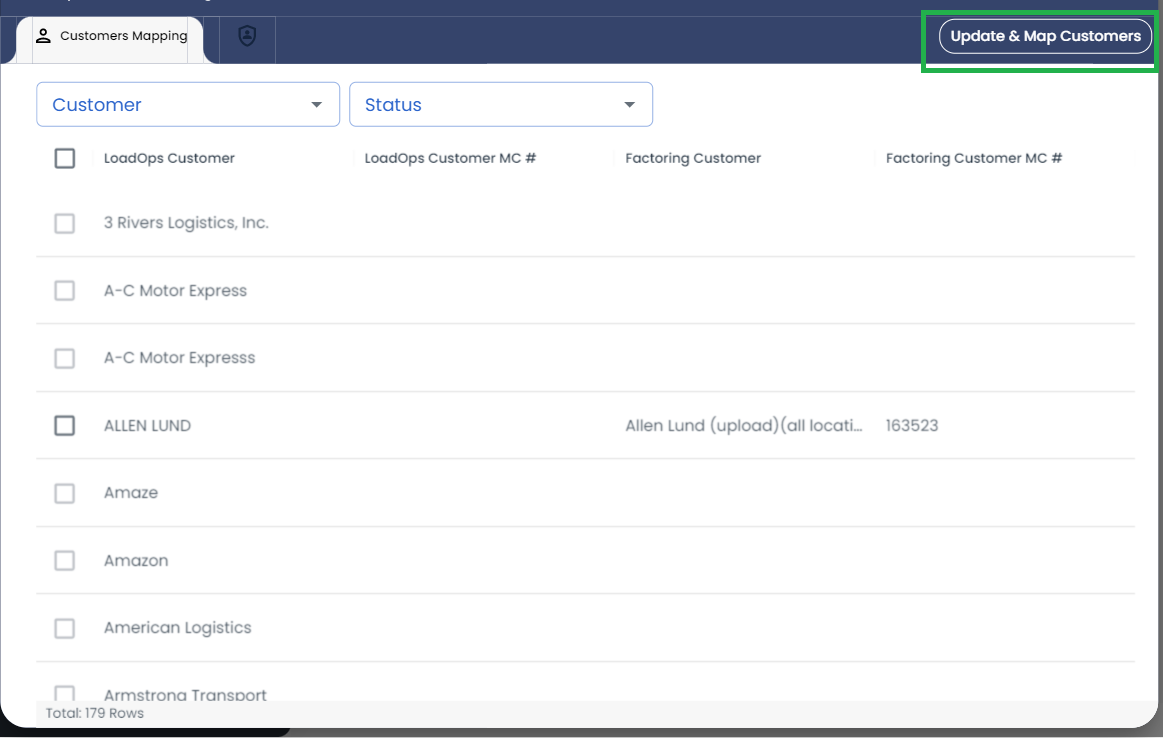
If a new customer is added or removed on Apex, you can update the customer list using the ”Update Customer List” option on the top right corner of the screen.
Map Your Driver With a Funding Account (Optional)
You can create a custom invoice number on Apex while syncing an invoice from LoadOps into Apex.
The custom invoice number = “Funding account mapped + Driver code + LoadOps Invoice ID”.
The purpose of creating a custom invoice number in Apex is to uniquely identify the driver and find the account the invoice is supposed to be mapped with while creating a schedule.
Since this is optional, if you do not provide the driver code and do not map the driver with the funding account, the LoadOps Invoice ID will be mapped with the Apex Invoice ID.
To map a driver with a funding account, click on ‘Manage Driver Mapping’ on the factoring card. This will bring up the following screens.
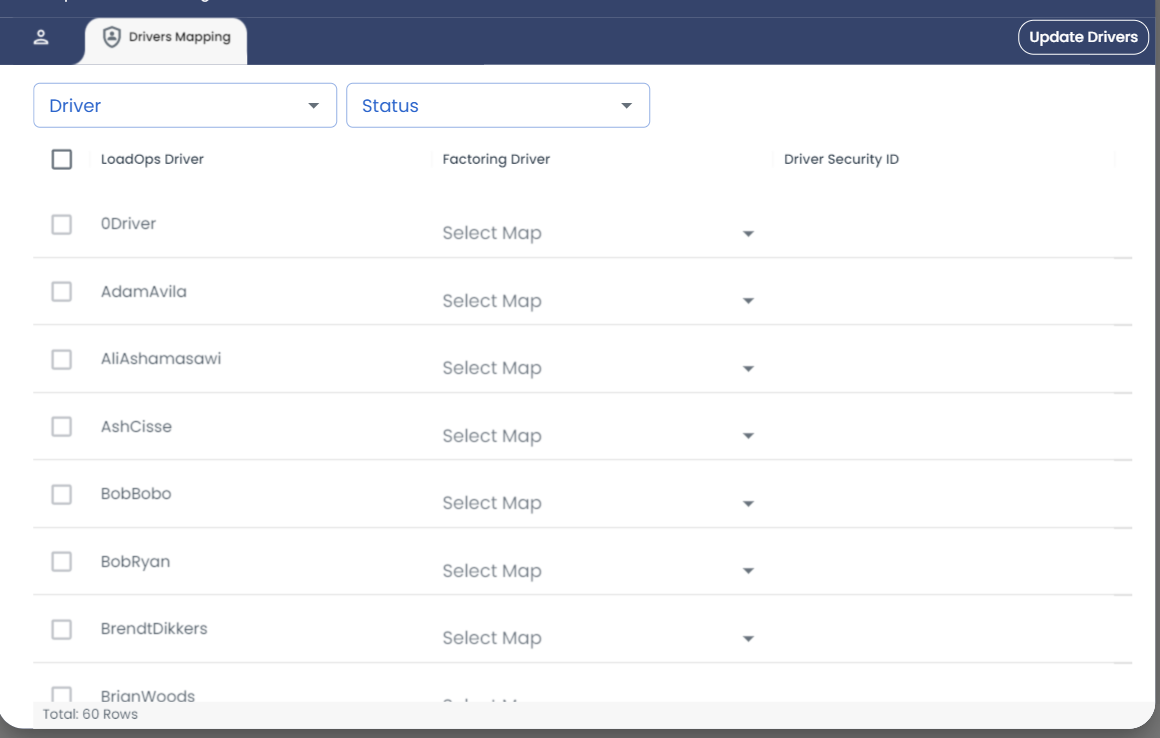
If a new funding account is added or removed on Apex, you can update the funding account code list using the Update Funding Account List option on the top right corner of the screen.
Assign Factoring Company to a Load
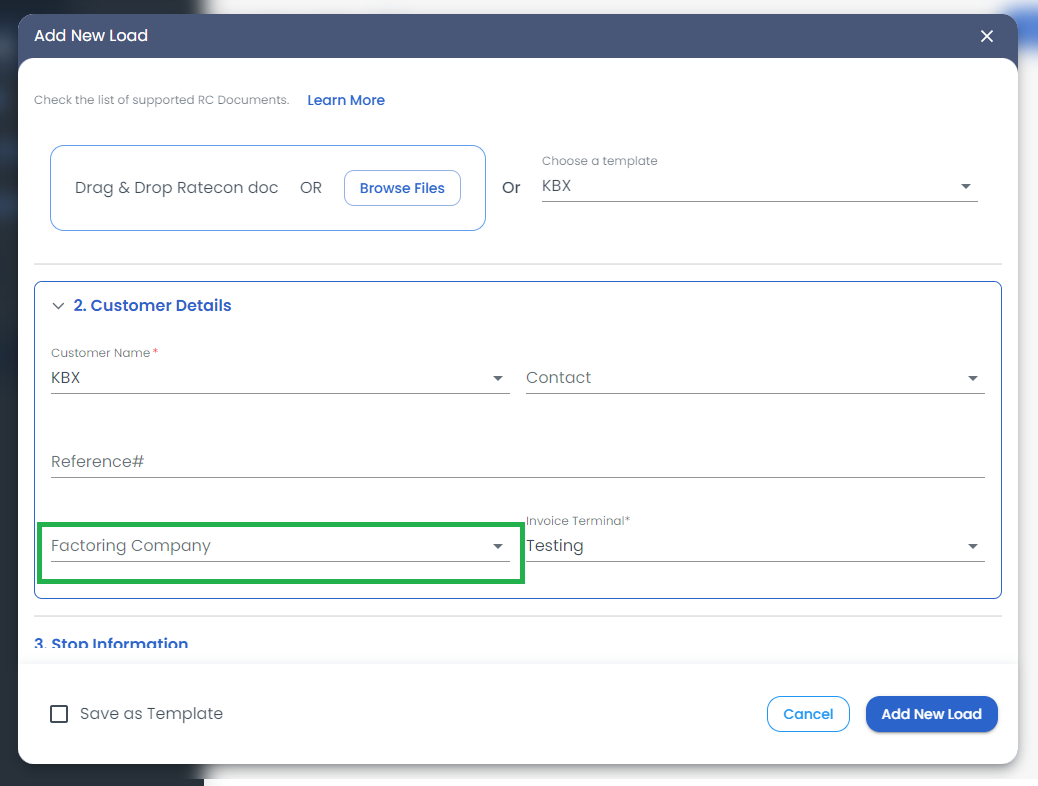
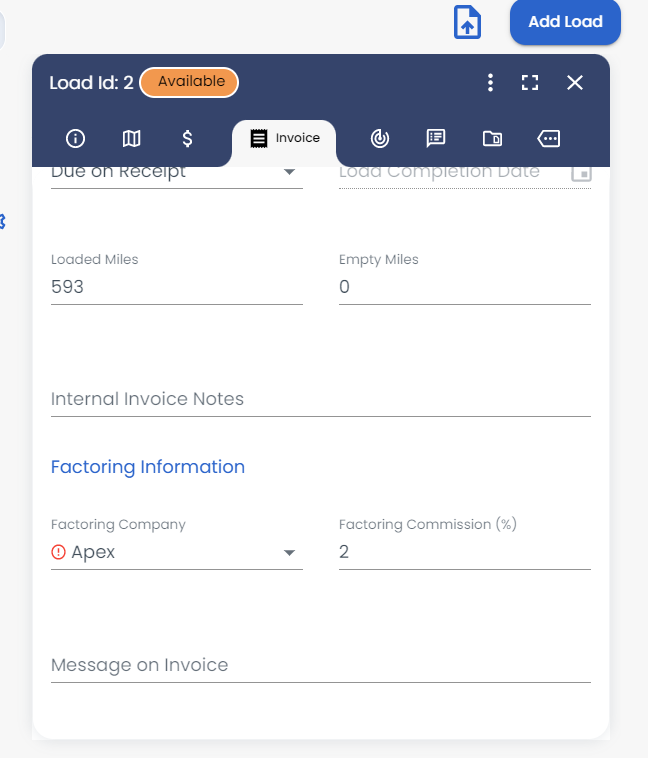
You can assign a load to a factoring company while creating a load or by editing a load as shown below.
While creating a load, once the customer is selected, the factoring option is auto-selected as per the customer set. You can still update the ‘Factoring Company’ from the dropdown list.
Once a load is created, the factoring company can be updated from the Invoice section until the load is invoiced.
Sync LoadOps Invoices With Apex
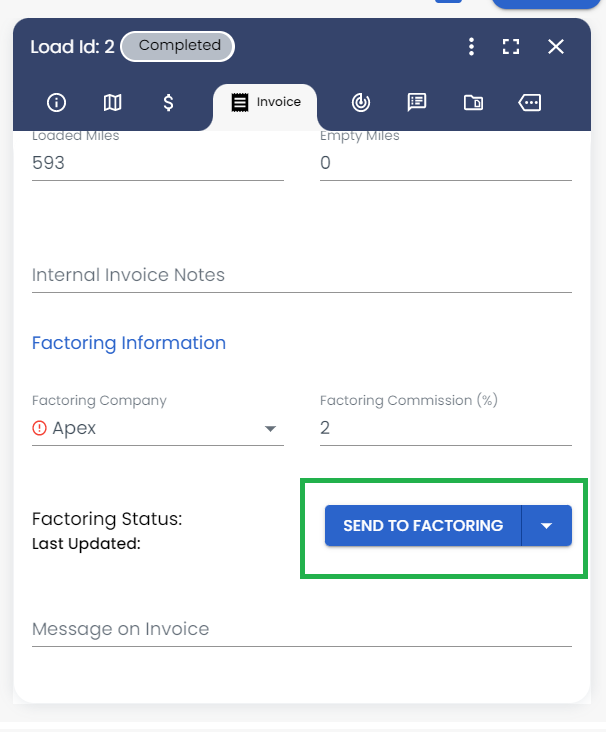
Once the load is factored with a factoring account with valid API integration, you should be able to send the load invoice for factoring as shown below.
Note: Only completed or invoiced load invoices can be synced with Apex.
Go to the Invoice section and scroll down > Click on Send to Factoring.