In this Article
1. Overview
2. Accessing the Load Board Search
3. Selecting the Integrated Load Boards
4. Review the Suggested Loads
4.1. Additional Details
4.2. Refreshing the Data
4.3. Sorting and Filtering the List
5. Quick Email Bid
6. Create a load and assign the load to your driver
Overview
LoadOps integrates with multiple load boards and suggests the best load for your driver based on their availability, location, hours of service, and preferences, and ranks the suggestions based on profitability, all within an intuitive interface. Say “goodbye” to the days of switching between multiple load boards and your TMS. Using LoadOps, you can efficiently find the best load across multiple boards and assign your driver, all without leaving the application.
Accessing the Load Board Search:
There are two ways to access the Load Board Search:
- From the Driver Dispatch Gantt chart
- By visiting from the left side of the navigation bar, Loads ▶️ LoadBoards
The load board search feature is helpful to fill available gaps in your driver’s timeline. The easiest way to identify the time available is through the Driver Dispatch Gantt chart.
Within LoadOps, click Dispatch on the left navigation bar to identify the time available for your driver. Look for the horizontal bars highlighted in red, orange, and white. For example,
the Second driver listed does not have a current load assignment (red bar). He needs a load now (see Image 1 below). Click Find Load.
Note: If there are existing loads on the timeline, you may have to scroll down for the next available gap.
If finding a load from the driver dispatch Gantt chart, the load board search would only be for the specific driver
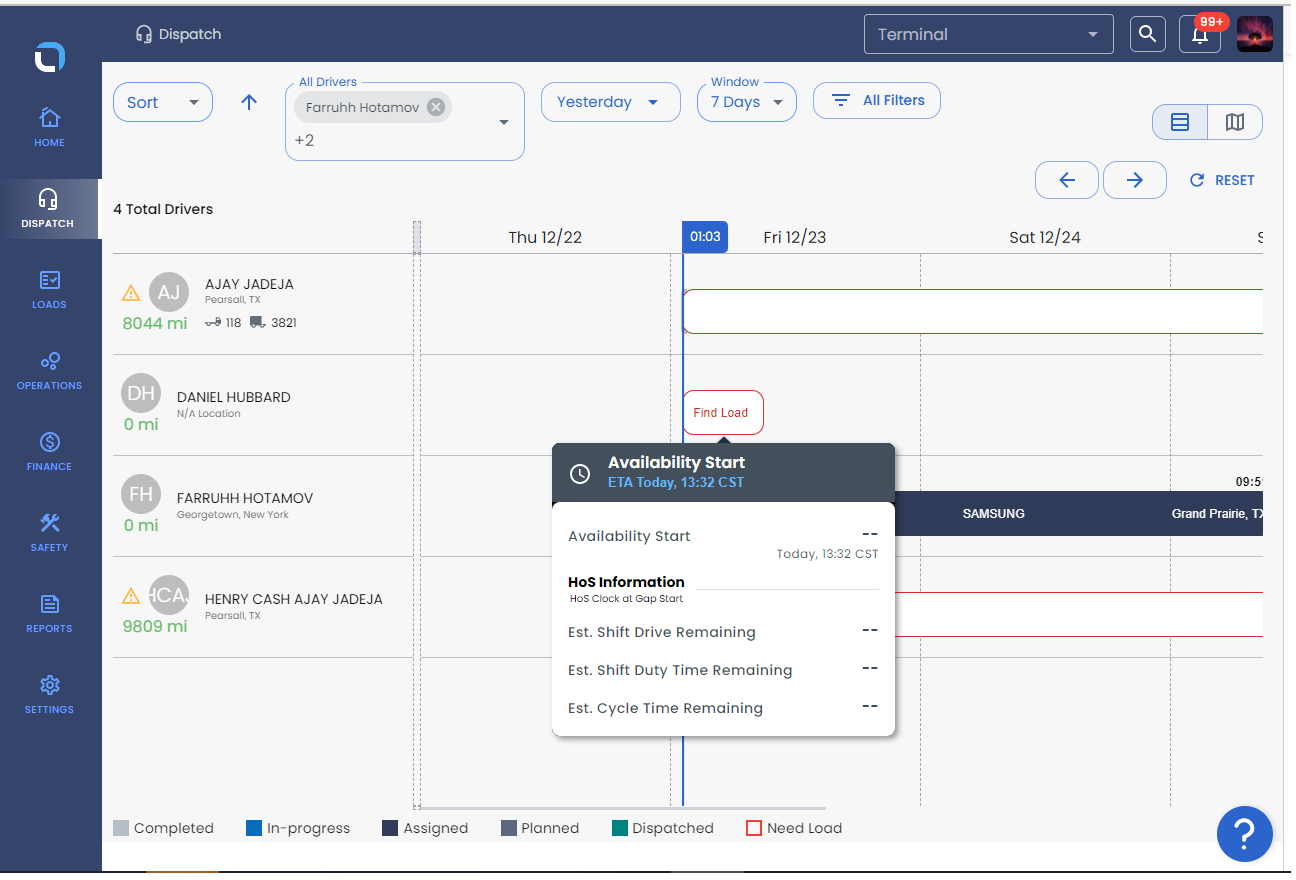
Clicking Find Load will take you to the Load Selection Assistant page. This is the beginning of the load board search process. You should see your integrated load board(s) at the top of this screen.
The Load Selection Assistant is comprised of three main steps:
- Select the integrated load boards
- Review the suggested loads
- Finalize and assign the load to the driver
We will cover each step below.
Selecting the Integrated Load Boards
Select each load board you would like to search against from the Dropdown LOADBOARDS and customize the search options as needed.
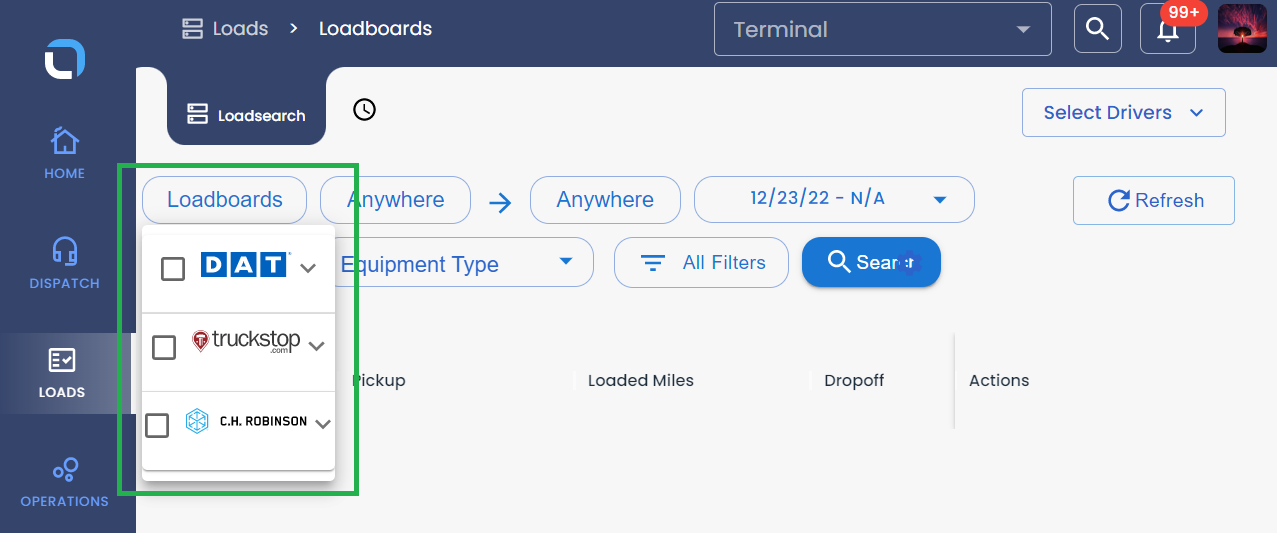
Note: If you find a load for a specific driver from the driver dispatch Gantt chart Fields such as Pick up Location and Drop off Location will be populated automatically based on your driver’s current location or destination of the current or future load.
Click on the "Anywhere" tab to enter the pick-up location and drop-off location.
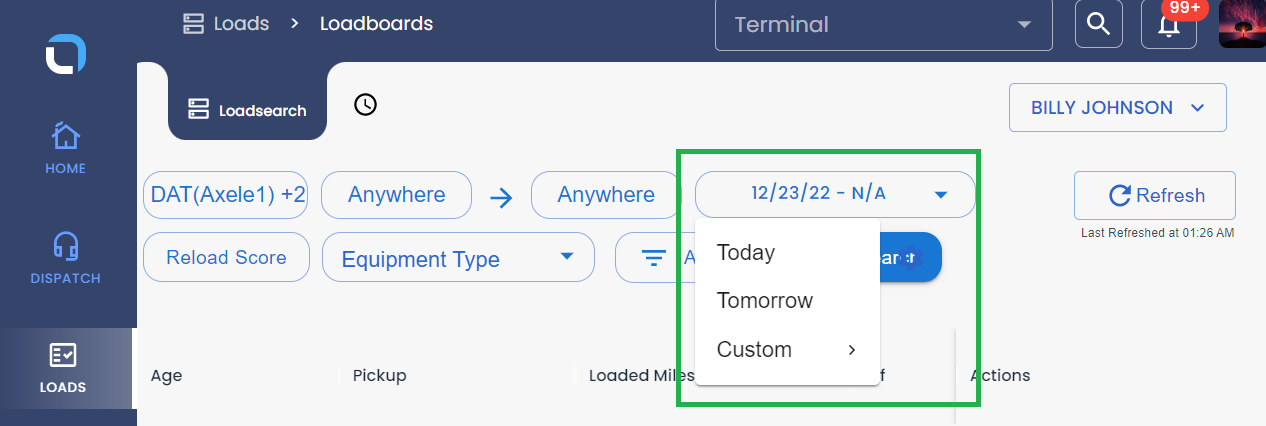
Select the Date range with options as "Today", "Tomorrow", and "Custom" as shown in the image below, and click on Search.
Review the Suggested Loads
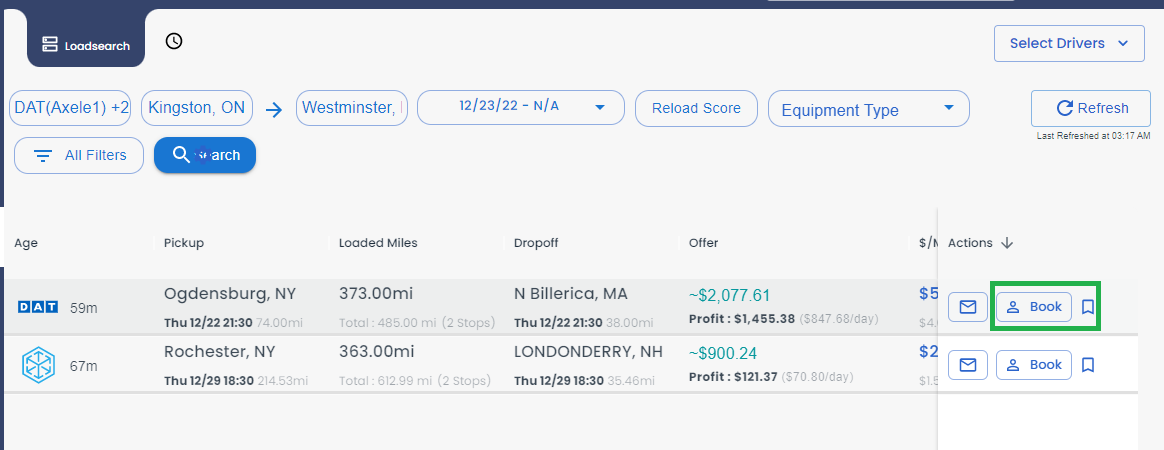
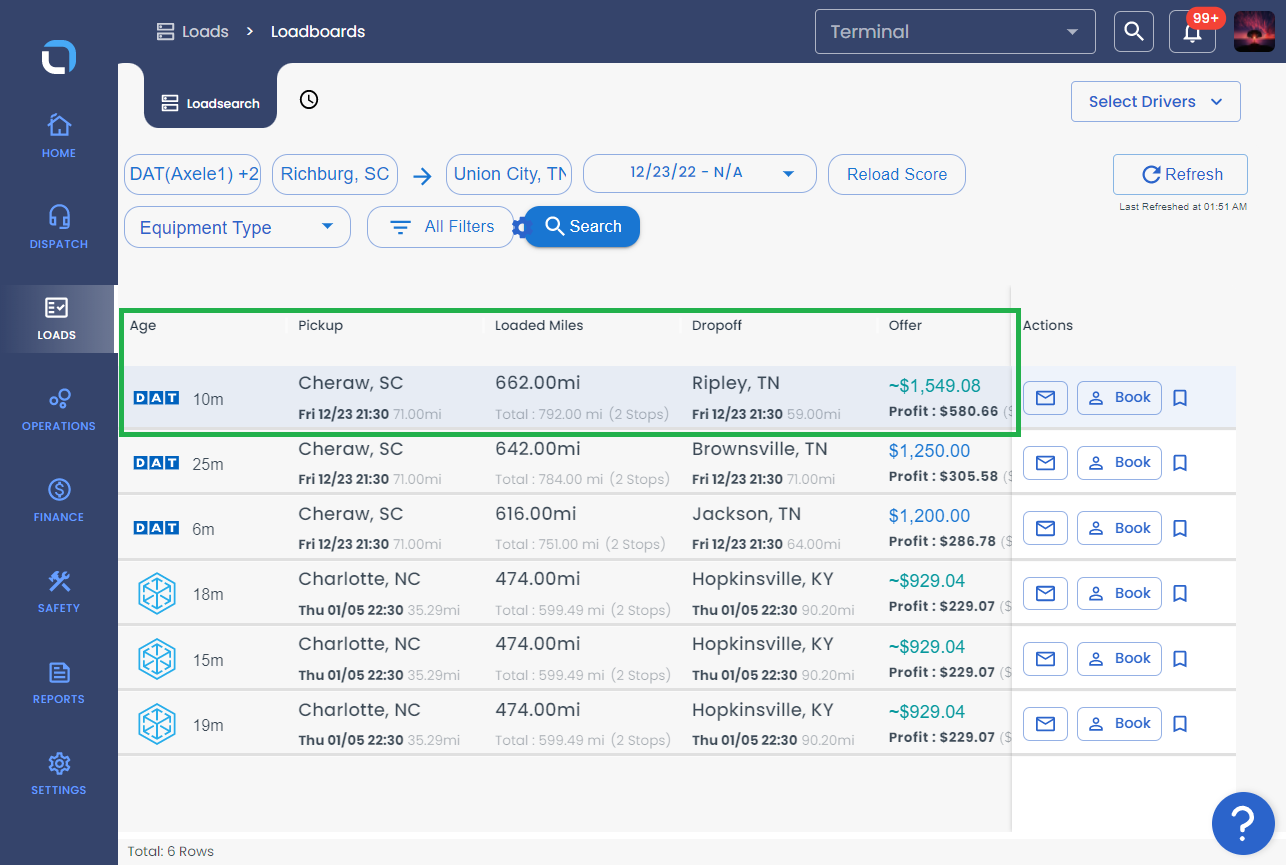
LoadOps takes your search criteria in the previous step and suggests a list of loads that match. By default, the search results are automatically sorted based on profitability (see Image below).
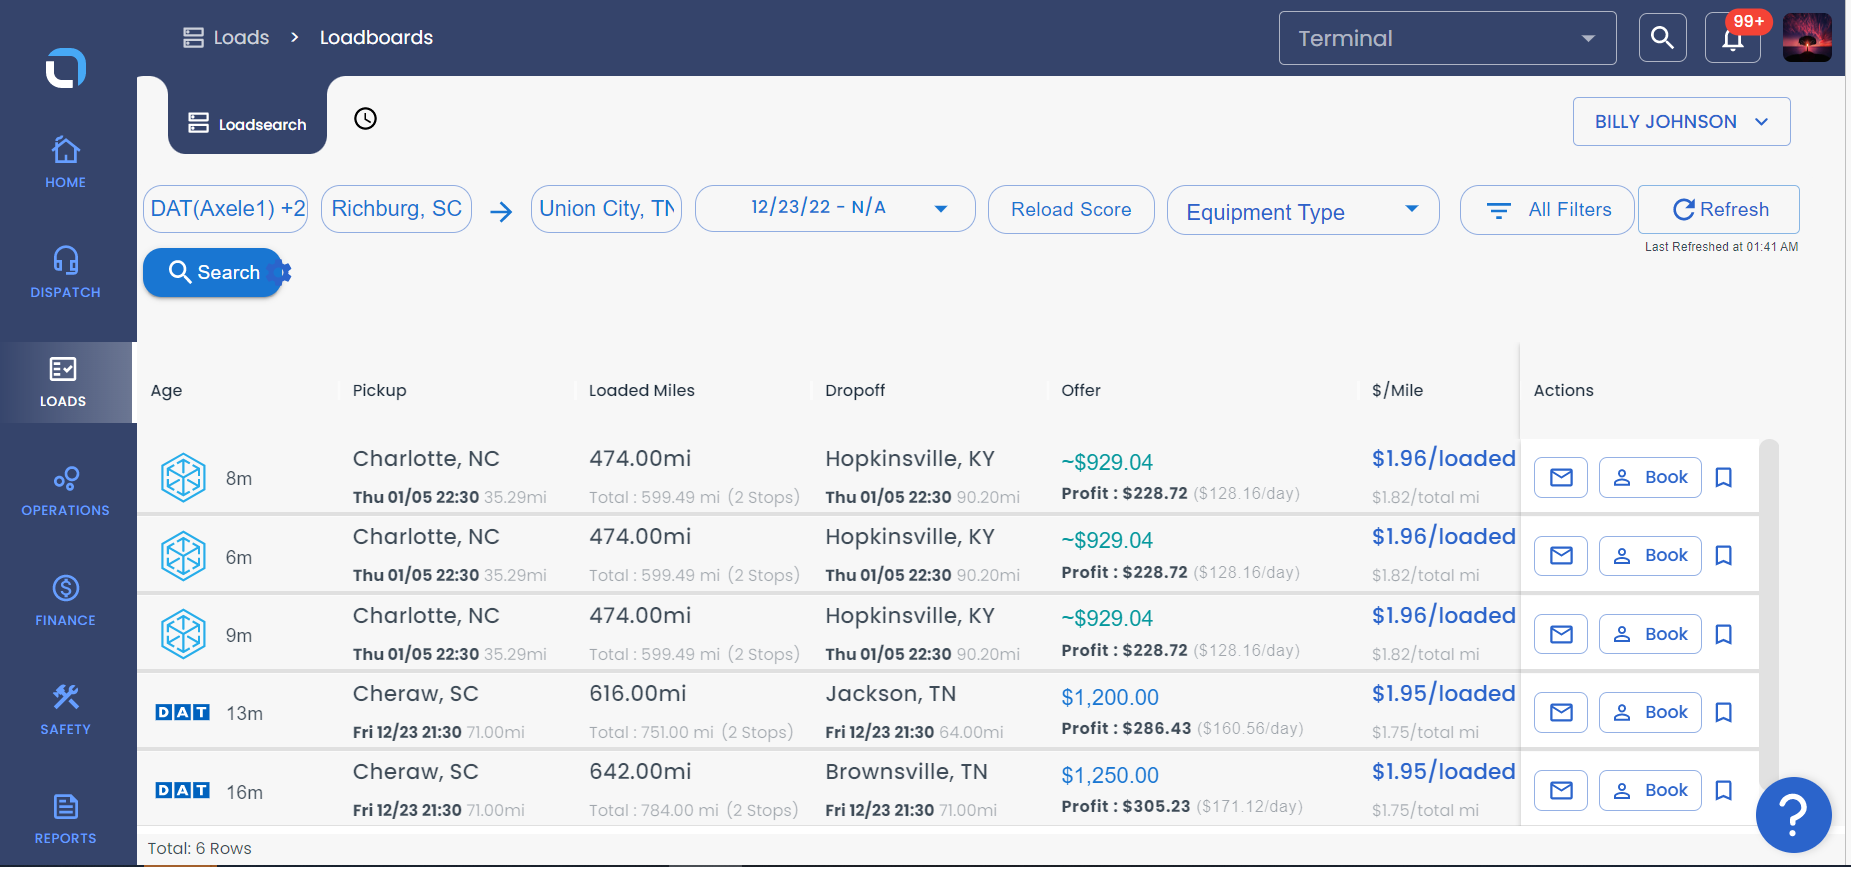
LoadOps pulls in important data on each load from the integrated load board provider and calculates several additional data points that can help you evaluate the load (see the image below). Each data point we pull in and calculate is defined in the table below.
Load Details and Data below:
| Data Point | Description |
| Age | How long ago this load was posted, reposted, or updated |
| Offer | The amount that the load pays as posted by the shipper or broker |
| $/Mile * | Estimated Revenue / Trip Miles |
| $/Loaded Mile * | Total Miles (Dead Head origin miles + Dead head destination miles) |
| Equipment | Equipment required to cover the load |
| Market Rate * | We maintain a database with up-to-date average rates for the entire US market This data point can be useful during load revenue negotiation with the shipper or broker |
| Broker | Freight Broker |
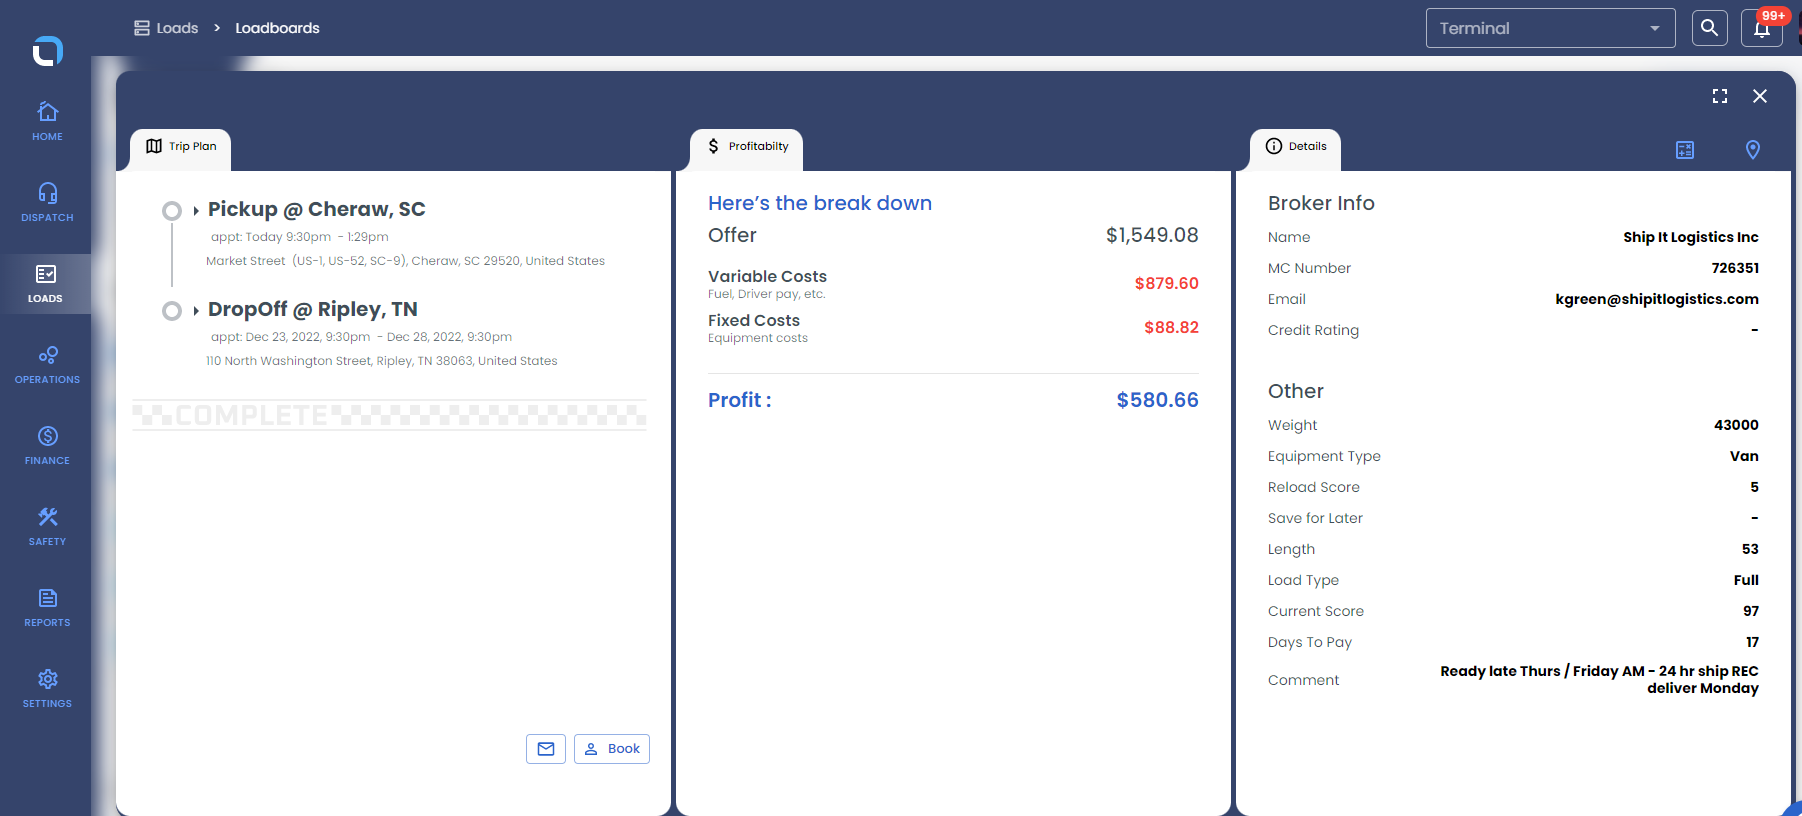
Additional Details:
Click on the row of the search result to review additional information about the load, and customer. To view the map, you can select the location option in the list of sections such as Trip plan, Profitability, details, and Map view.
You can select each load and view the origin and destination pair on the map. Give it a Try!
Refreshing the Data
Clicking the Refresh button near the top right of the suggestion list will pull in the most recent data from the integrated load board(s). This is helpful for finding the most recent loads added based on your search criteria without leaving the current page

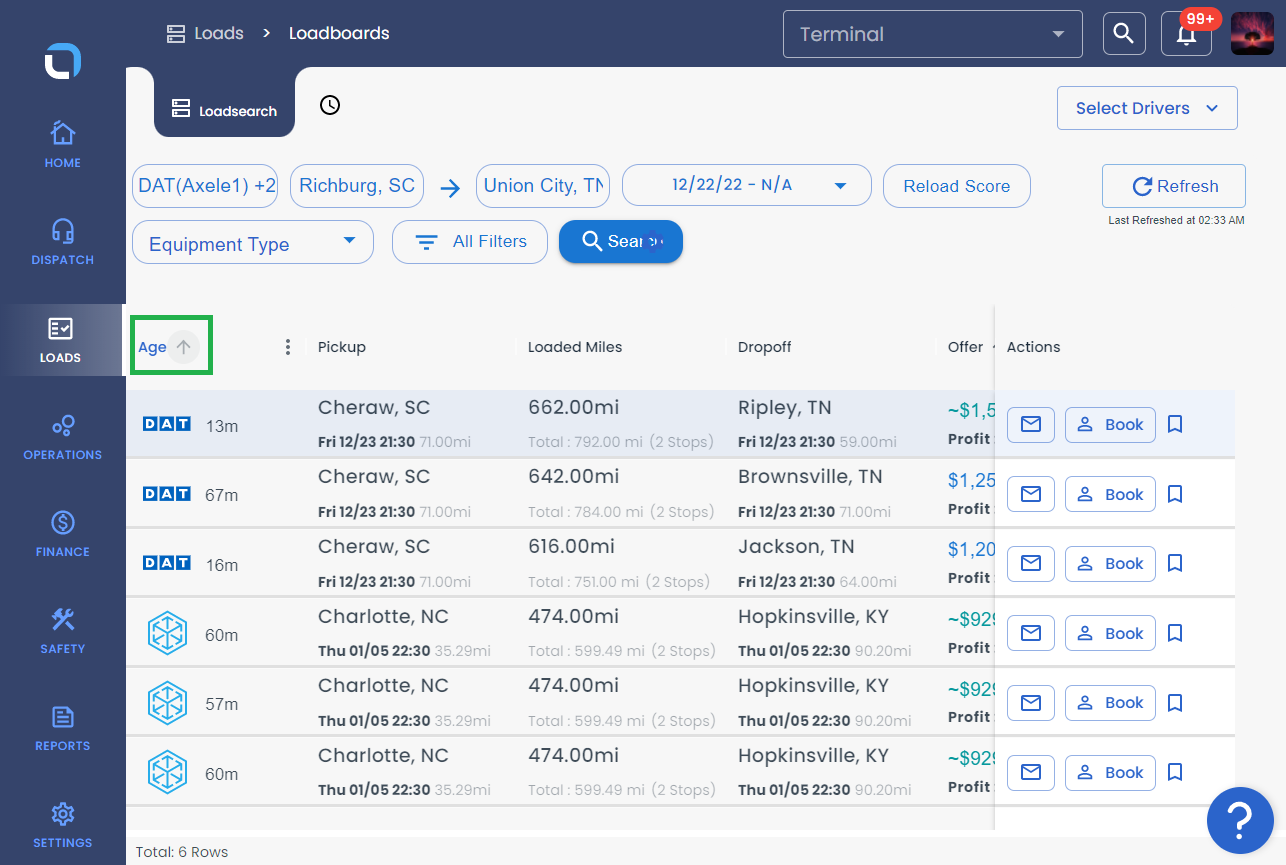
Sorting and Filtering the List
By default, the list is sorted by Offer. Clicking the arrow next to this option will further sort the list in ascending or descending order
Filtering:
Use this filter to only show the loads with particular criteria.
Here are the options for Filtering:
- Age
- load board
- Pick-up and Drop-Off location
- Reload Score
- Estimated Total/Offered Price
- Equipment type
- Max Origin and Destination Deadhead
- Load Types
- Customer preferences
- Equipment length
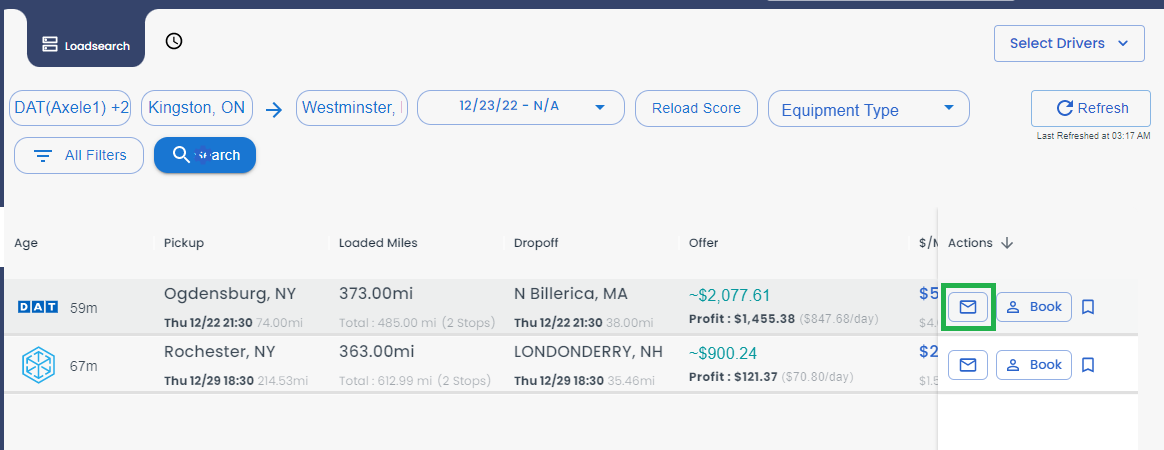
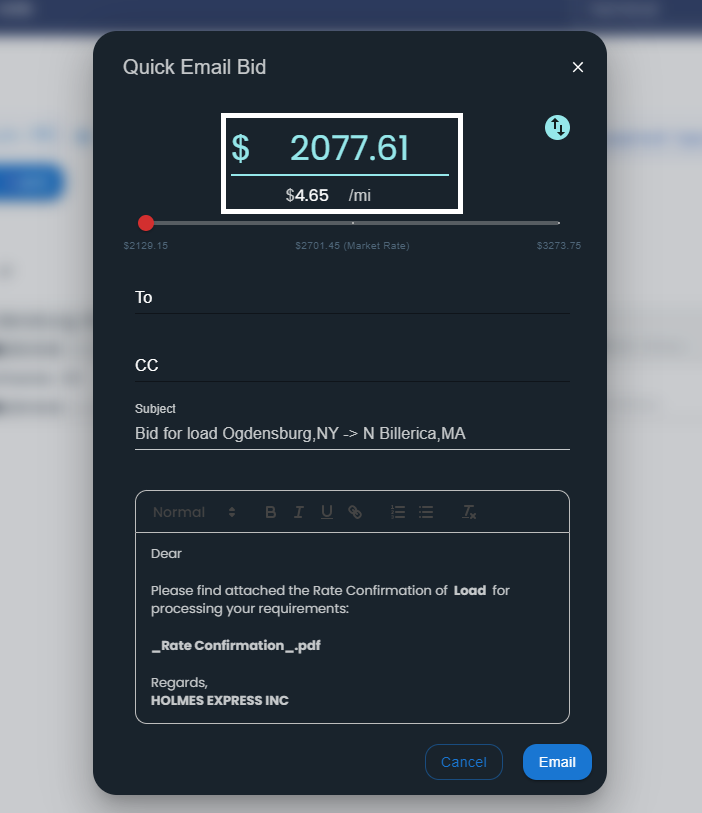
Quick Email Bid
By the Mail option ( See the below Image), you can send an email to the broker to confirm the load and Bid for the load with a different rate.
You have the option to edit the Revenue of the load here if you negotiated a different rate with the shipper or broker. This amount will eventually show up on the customer invoice for this load. ( follow the image Below)
Create a load and assign the load to your driver
Once the load is confirmed by the broker you can click on the "Book" option to create a load. This will take you to the Add a Load page. Learn more about this page here: LoadOps- Add a Load