OTR Solutions
Overview of integrating OTR Solutions factoring into LoadOps
In this article
Overview
By integrating your OTR Solutions account with LoadOps, you can easily send invoices to your factoring provider for them to fund. This article discusses the process of integrating your OTR Solutions account with LoadOps.
Don't have an OTR Solutions account? Click here for Full-Service Factoring, Instant Funding on Invoices, & Online/Mobile Invoicing.
Activate OTR Solutions Integration
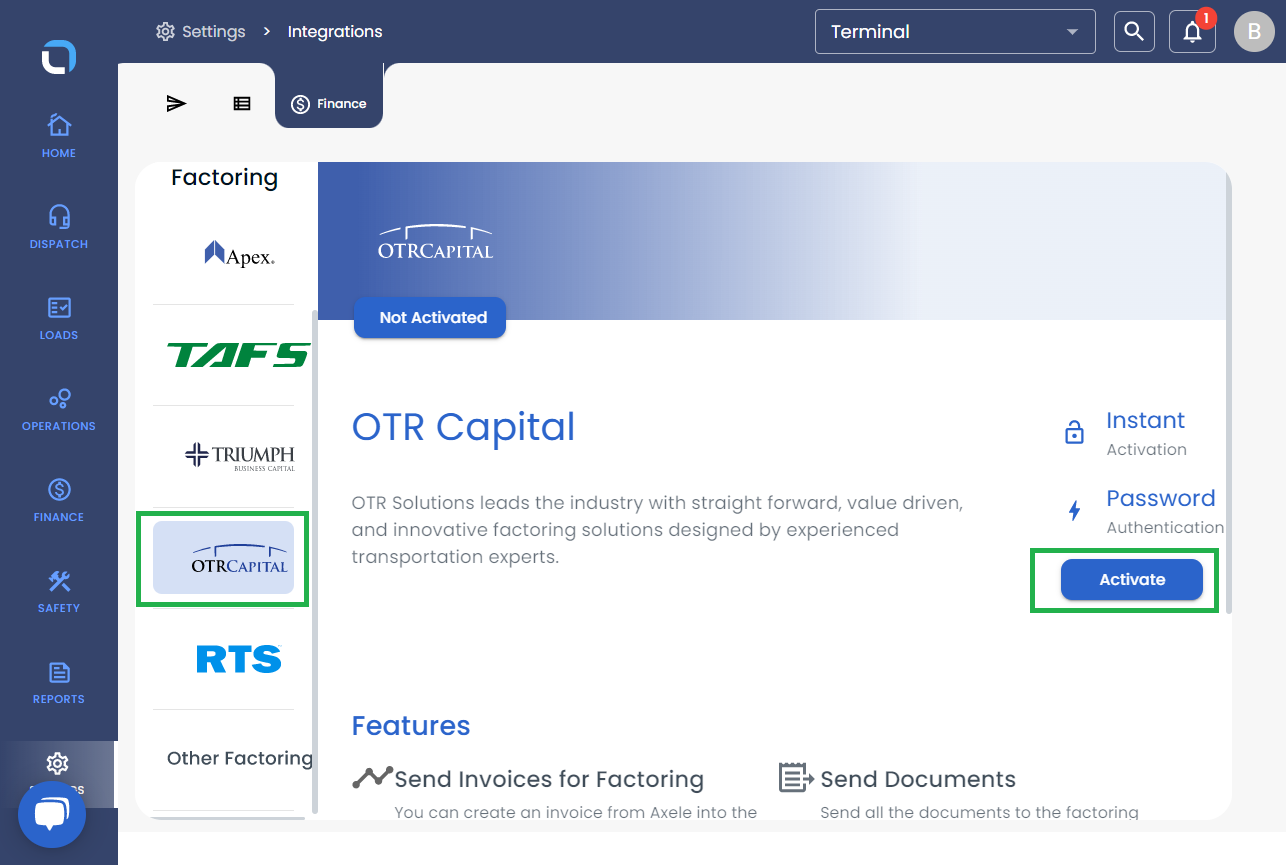
- From within LoadOps, go to Settings▶️ Integrations ▶️ Finance ▶️OTR Capital.
- Select Activate (or, if you already have one OTR Account connected, Add New Account) (see Image 2 below), and complete all required fields (Note: The Display Name field is the name you would like posted on the integration card once you add this integration and for internal use. The Name on Documents field is the name you would like posted on any external documents, like the invoice, to be sent to your factoring company.)

Activate API Integration
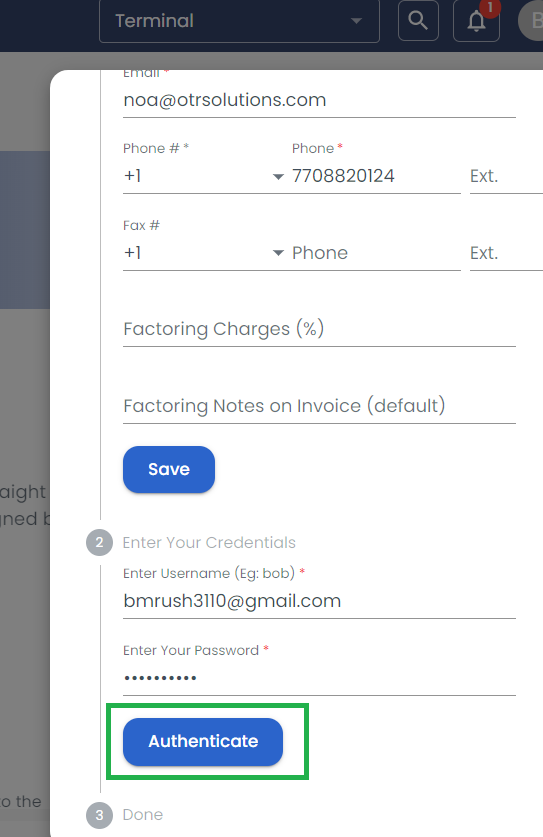
Once the factoring company Details (User name and password ) have been added, click on the Authenticate button on the factoring card added, as shown below:

This will connect your OTR Solutions portal and allow you to begin mapping customers.
To best map customers, it is a best practice to have MC # and matching the name to that customer within the OTR Portal.
