
In this article
Overview
Using the integration with QuickBooks Online (QB), you can connect your QB account with LoadOps and easily send your LoadOps customers (shippers/brokers) and invoices to QB.
Syncing your invoices with QB is a five-step process. Let’s get started!
Interactive Workflow
Step 1: Activate Integration
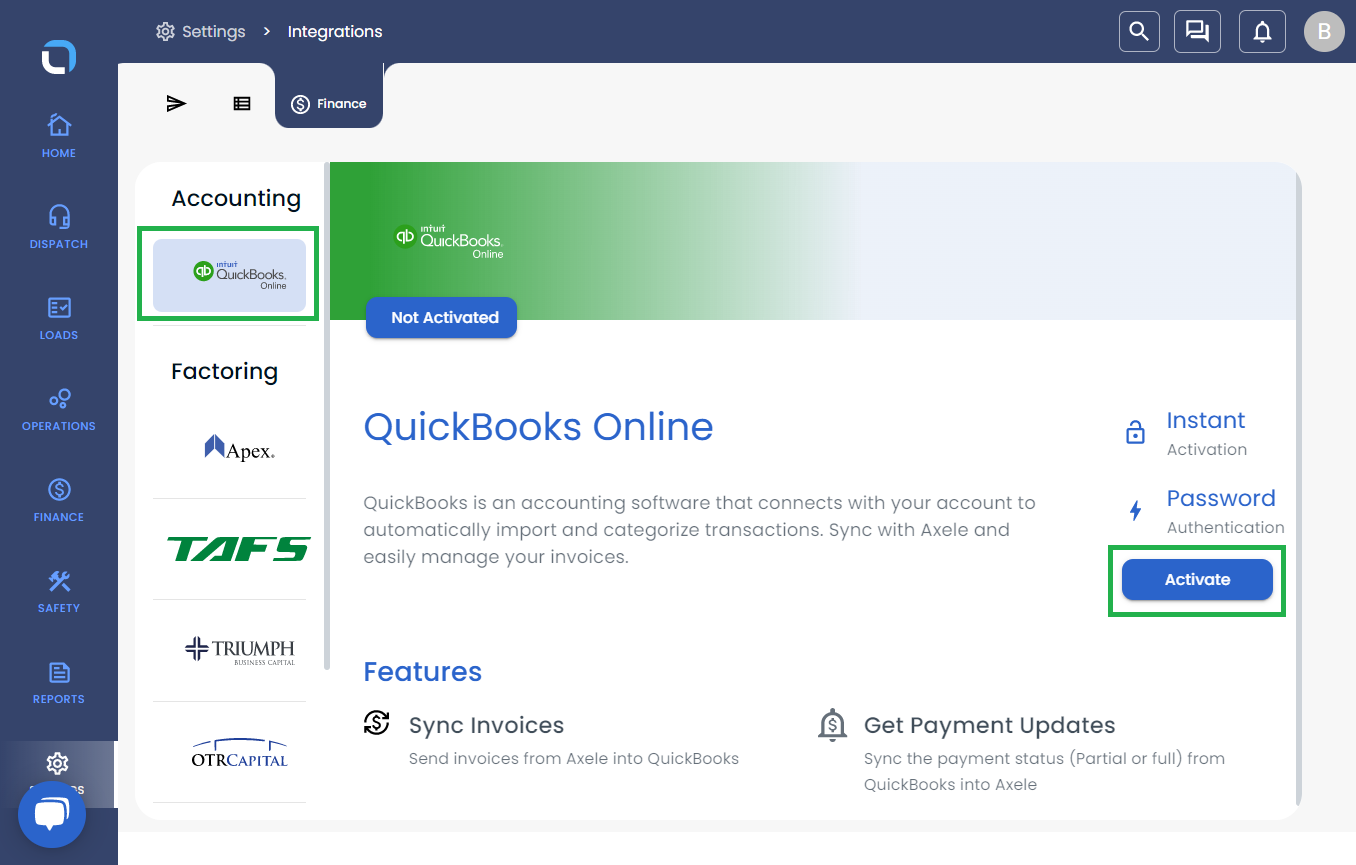
Within LoadOps, go to Settings ▶️ Integrations ▶️ Finance ▶️ and click on QuickBooks from the list. On the right side of the screen, you can select Activate, Enter the Display name, and click on Connect. The Display name is strictly an internal reference to help identify the connection if you add multiple accounts.
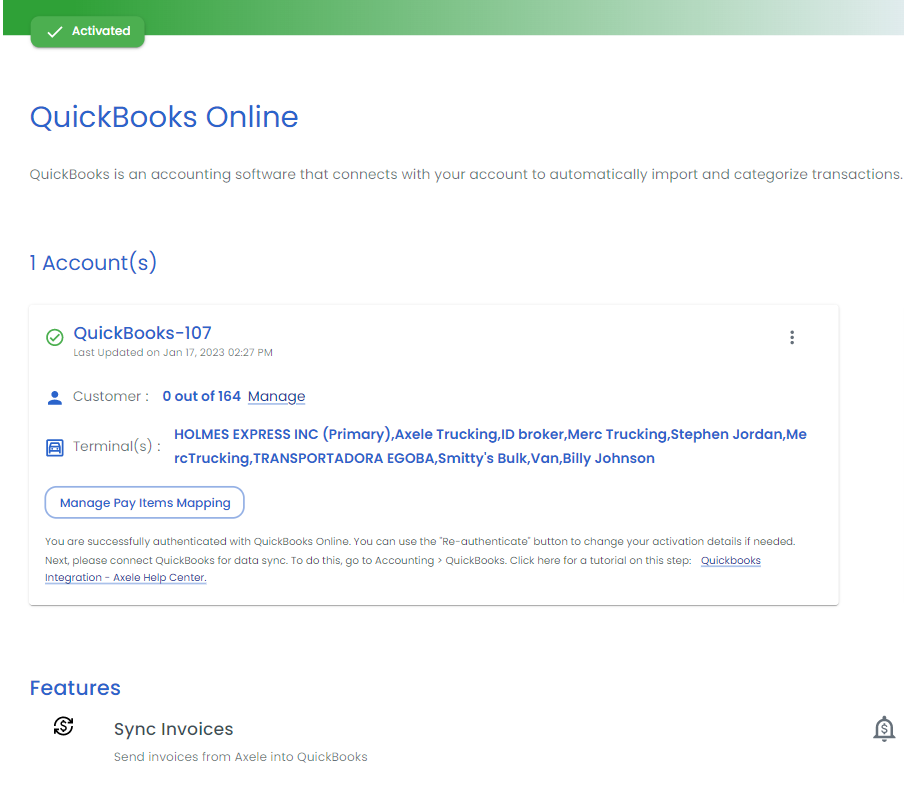
This will take you to a QB login screen. You can enter your QB credentials to sign in. You will then be sent back to LoadOps with a message saying, “You are successfully authenticated with QuickBooks Online.”
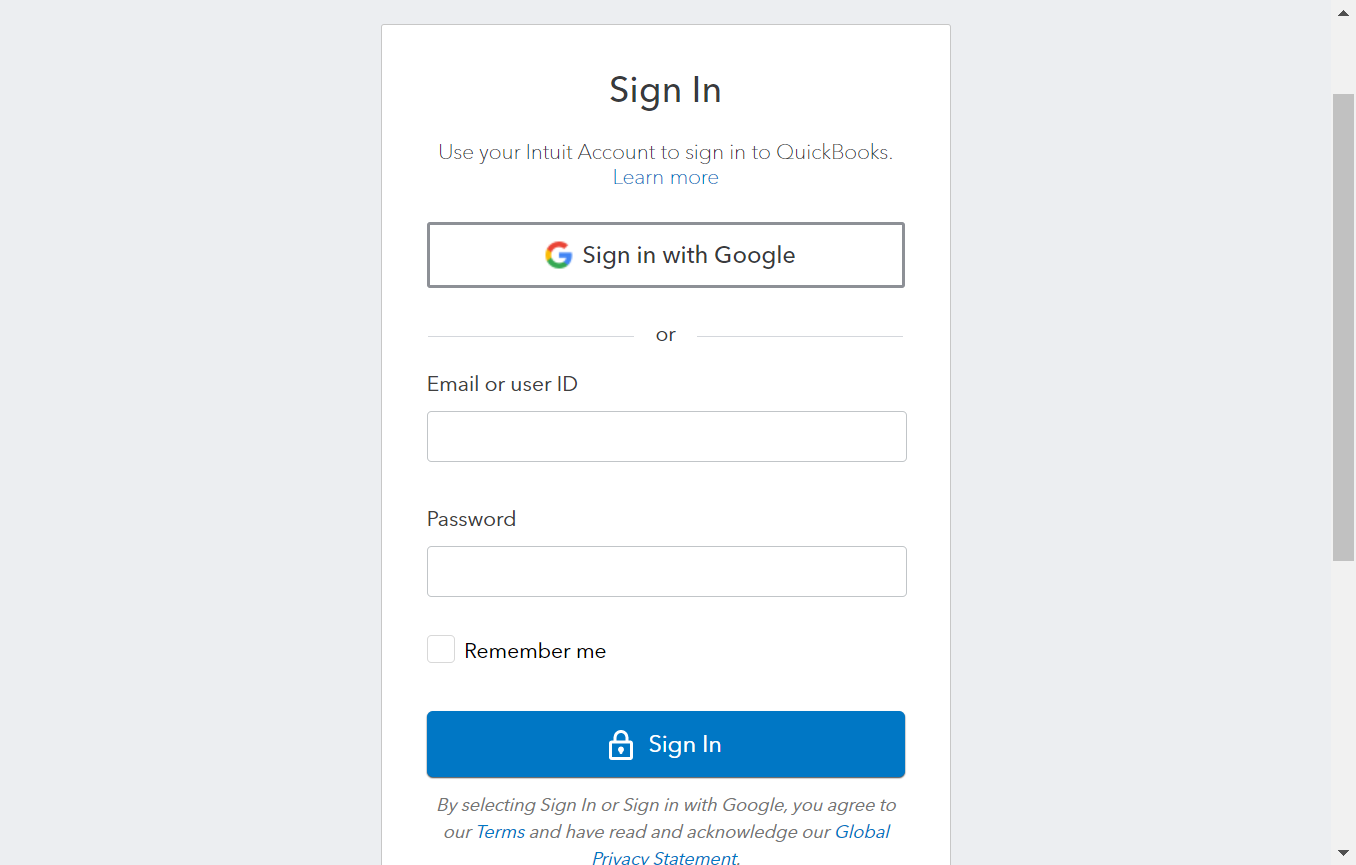
You can enter your QB credentials to sign in.
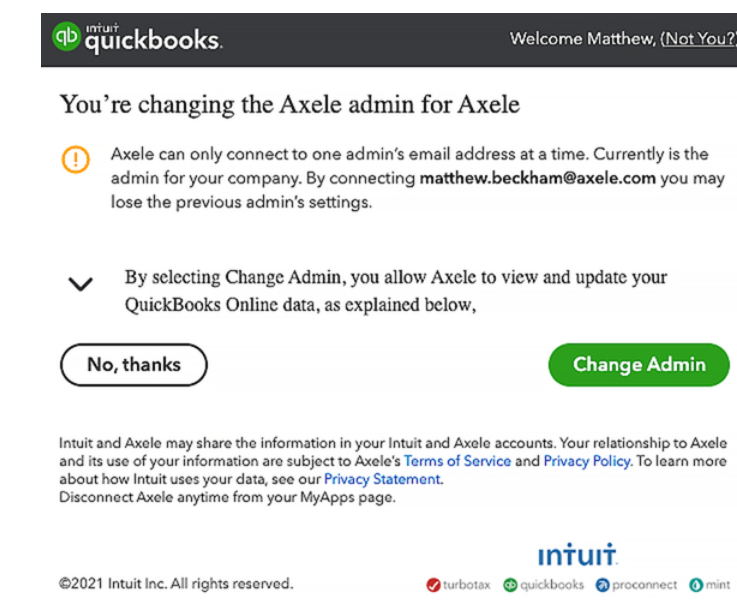
There can be only one connected admin account within this integration. If you see this window, keep the existing admin account connected or change to a different one.
Step 2: Start QuickBook Session QB for Data Sync
Within LoadOps, go to Settings ▶️ Integration ▶️ Finance ▶️ QuickBooks and click the green “Start QuickBook Session” button at the top right of the screen to connect LoadOps to QB for data syncing.
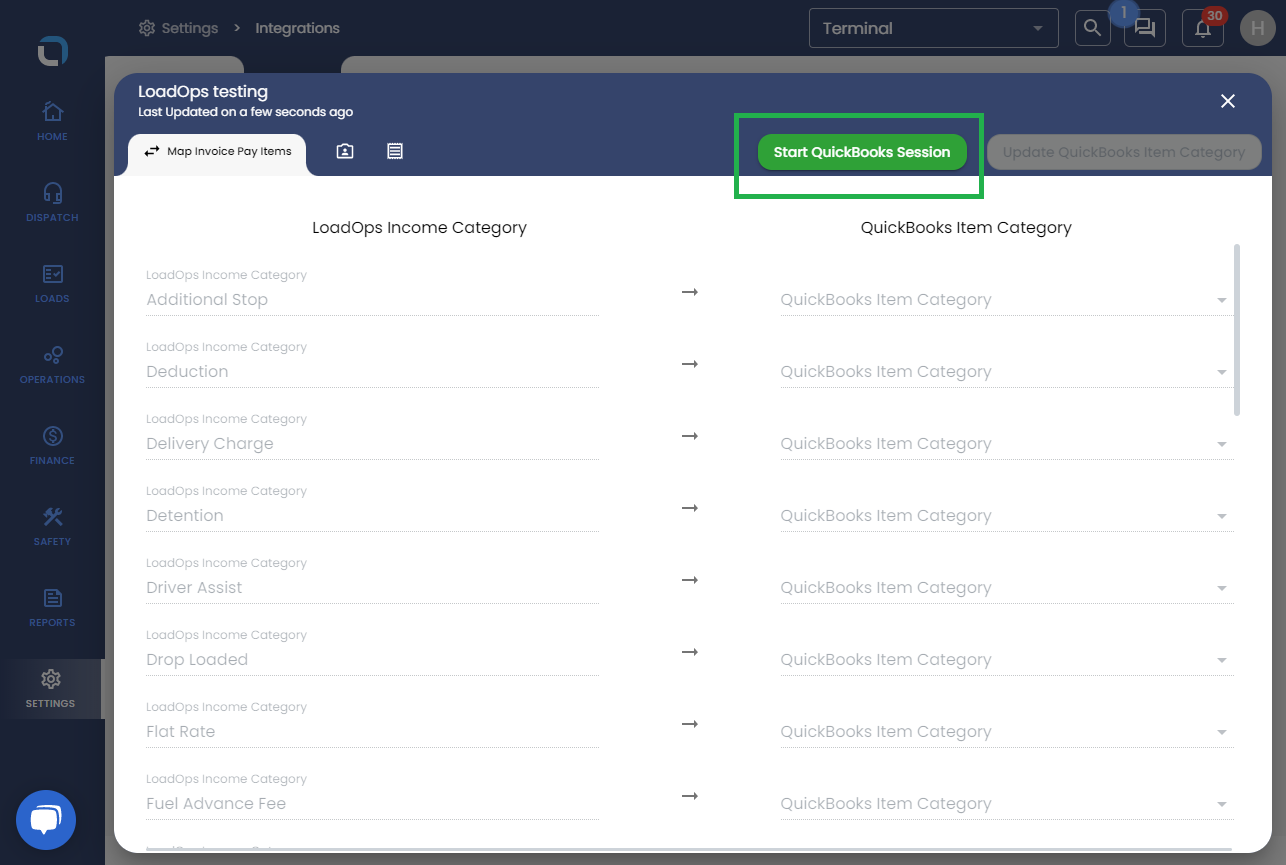
Step 3: Map LoadOps Income Categories
Could you make sure each LoadOps income category is mapped to a Product or Service in QB? To do this, click each field in the column to the right to select a Product or Service from your QB account.
If you need to add a Product or Service to map with a LoadOps Income Category, please visit https://quickbooks.intuit.com/ca/tutorials/adding-products-and-services/ to learn how to do this. If you add a new Product or Service, pull your latest list into LoadOps by clicking the Update QuickBooks Item Category. If you have an extensive list in QB or do not see the item you are looking for, remember that the QuickBooks Item Category fields are searchable!
This step is performed only once unless a new income category is added.

Step 4: Map LoadOps Customers with QB Customers
Once each LoadOps Income Category is mapped to a QB Item Category, click the “Customers” tab to the right of the “Map Pay Items” tab to see the list of customers that need to be sent to QB.
To do this, select “Non-synced” on the QB Status filter and click “Fetch Customers” to show the list of Customers that can be synced with QB. Select individual customers, or the complete list, then click “Send to QB” to sync to QB. Quickbooks Synced vs. Not Synced lists depends on the exact pairing of Customer Names. If you, the customer, already exist in Quickbooks and you are not seeing it sync, it is likely just a difference in spelling.
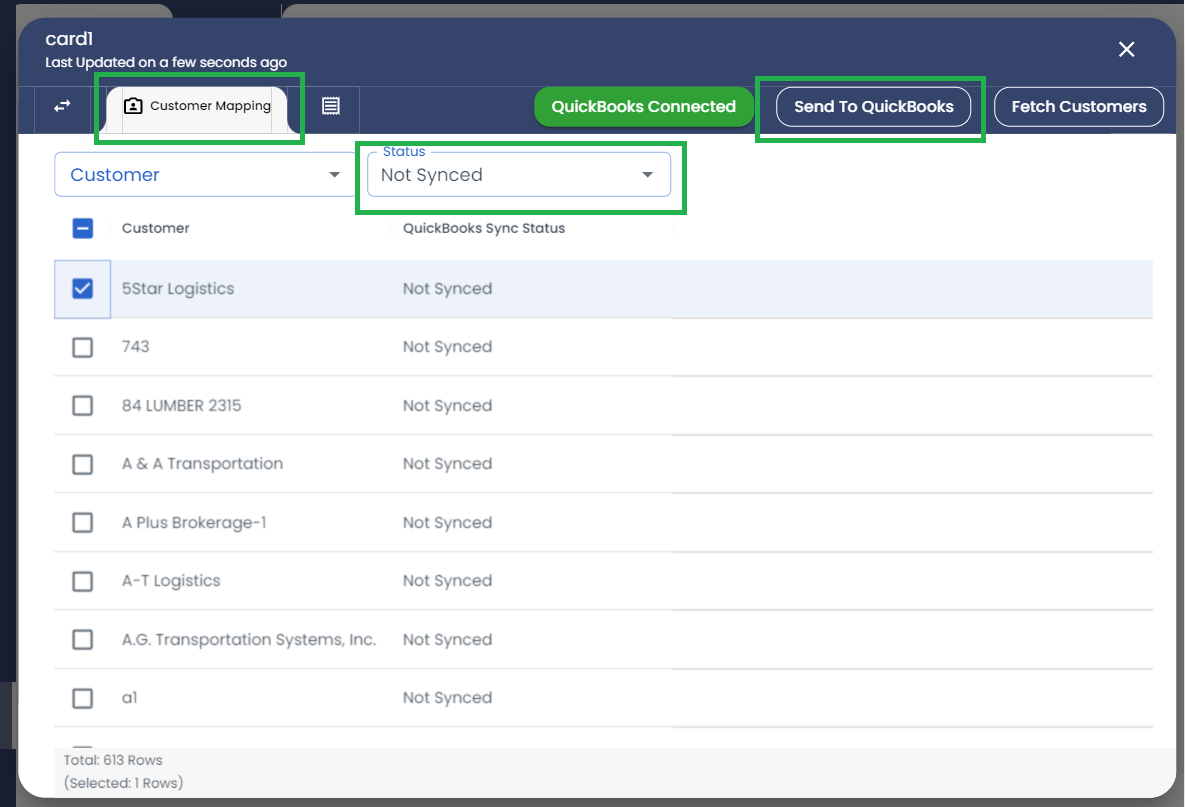
You must sync a customer with QB before you can send an invoice related to that customer to QB.
Step 5: Send Invoices to QB
Click on the “Invoices” tab to the right of the “Customers” tab (towards the middle of the screen). To view the invoices that need syncing, ensure the “QB Status” filter is set to “Non-synced.” You can also filter this list by the invoice date.
Select individual invoices, or the complete list, then click “Send to QB” to sync to QB. This can be done from the Invoice section of LoadOps as well.
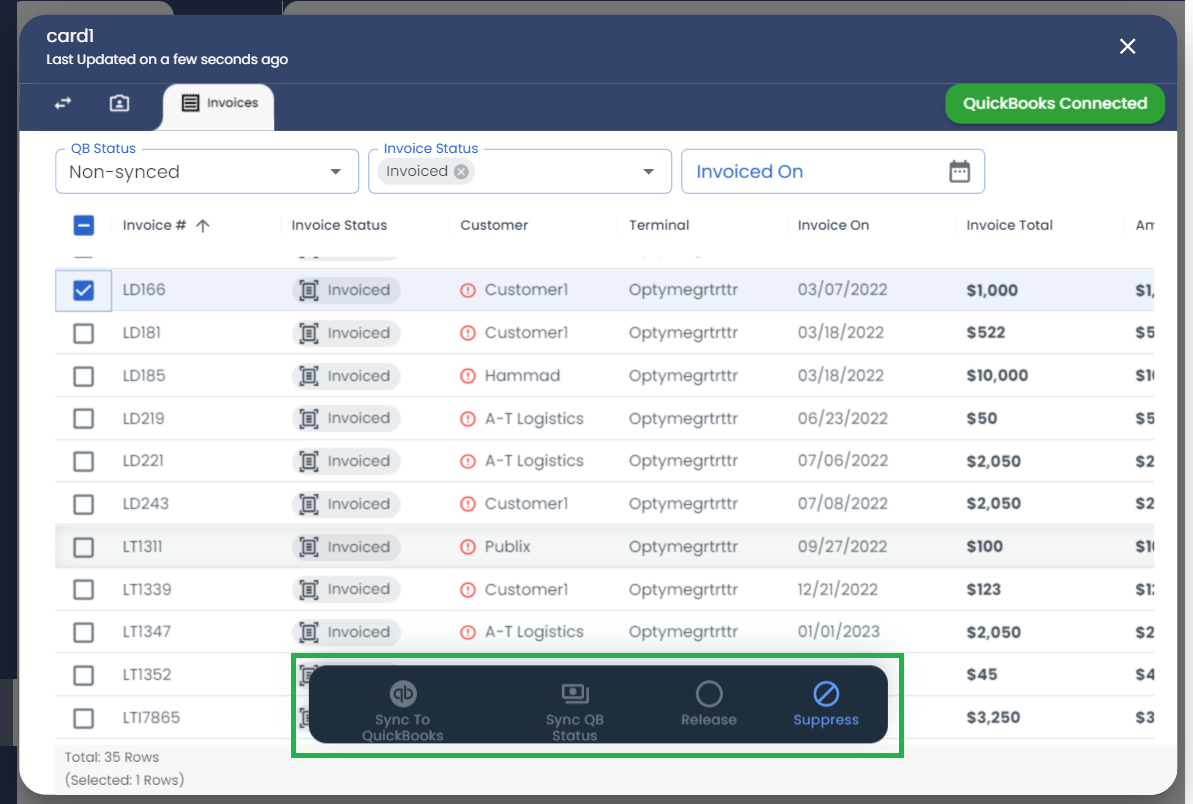
You will notice a few additional buttons above the list of invoices and to the left of the “Send to QB” button. Each one is defined below.
Suppress
- Used to block an invoice from syncing with QB
- Invoices marked as suppressed are not able to be sent to QB
Release
- Used to revert the invoice that was suppressed
- Released invoices can then be sent to QB
- To release a suppressed invoice, select the suppressed invoice and click the “Release” button
In general, there are three possible states of a LoadOps invoice related to QB:
- Synced: already sent to QB
- Non-Synced: not sent, but allowed to send
- Suppressed: not allowed to send to QB