RTS
Overview of the process to integrate your RTS factoring account with LoadOps
In this Article
Overview
By integrating your RTS account with LoadOps, you can easily send invoices to your factoring provider for them to fund. This article discusses the process of integrating your RTS account with LoadOps.
Activate RTS Integration
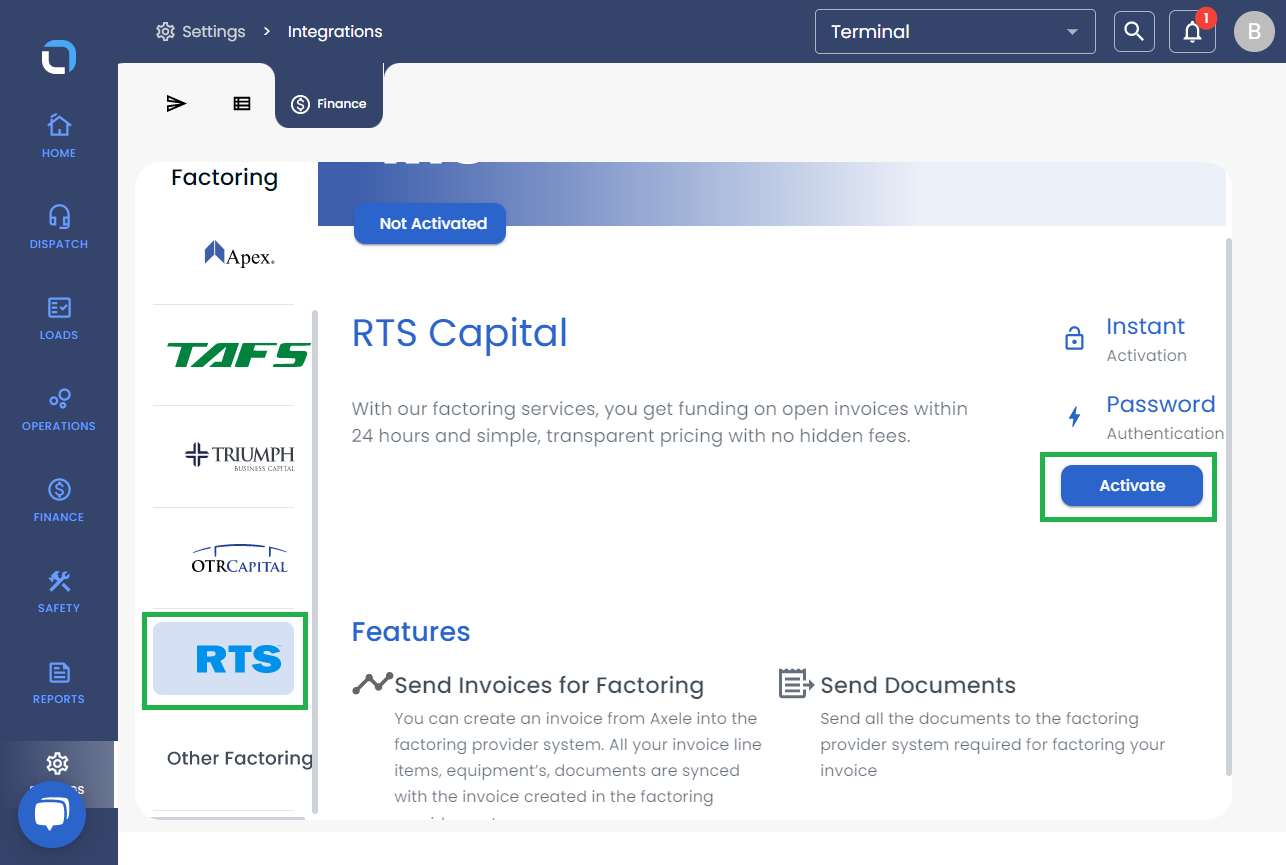
- Go to Settings ▶️ Integrations ▶️ Financials and click on RTS
- Click Activate to create the integration, Fill out the details and click on Request Integration.
- The next step is to reach out to the RTS account manager and request "to open an FTP integration ticket via helpdesk" to get RTS integration credentials for LoadOps after which you can activate RTS integration.

.
Assign Factoring Company to a Load
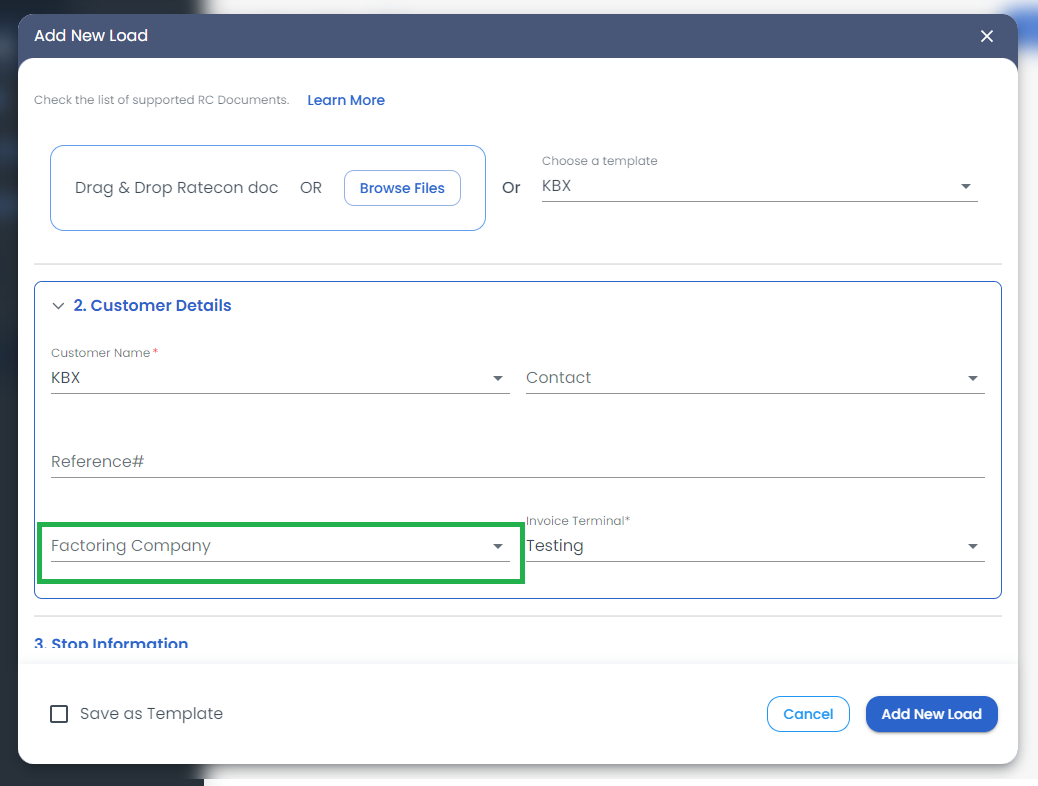
You can assign a load to a factoring company while creating a load or by editing a load as shown below.
While creating a load, once the customer is selected, the factoring option is auto-selected as per the customer set. You can still update the ‘Factoring Company’ from the dropdown list.

Note: Once a load is created, the factoring company can be updated from the Invoice section until the load is invoiced.
The RTS integration works by uploading documents to a mapped SFTP folder, therefore the communication is only one-way. Any further updates must be collected via the RTS online web portal.
