
In this article
Overview
By integrating your Triumph account with LoadOps, you can easily send invoices to your factoring provider for them to fund. This article discusses the process of integrating your Triumph account with LoadOps.
Activate Triumph Integration
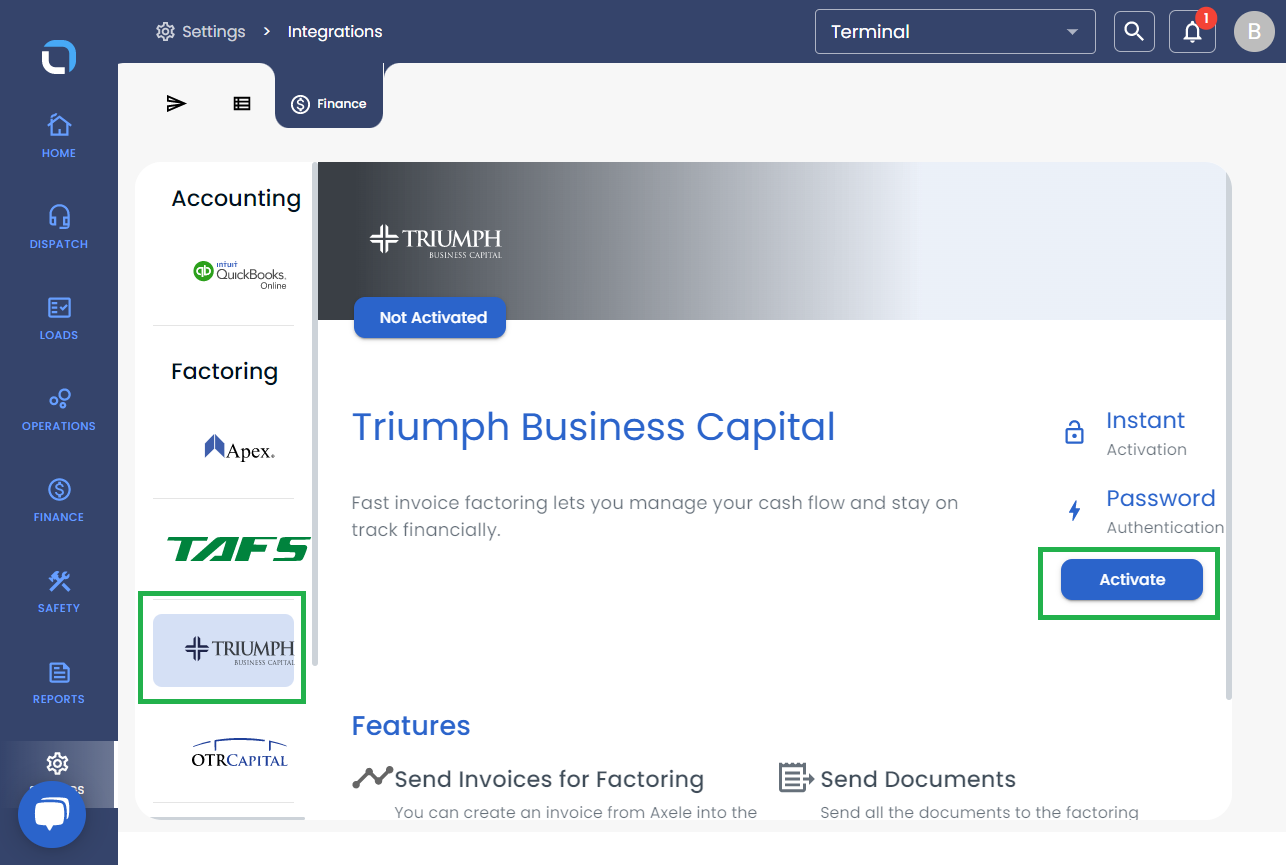
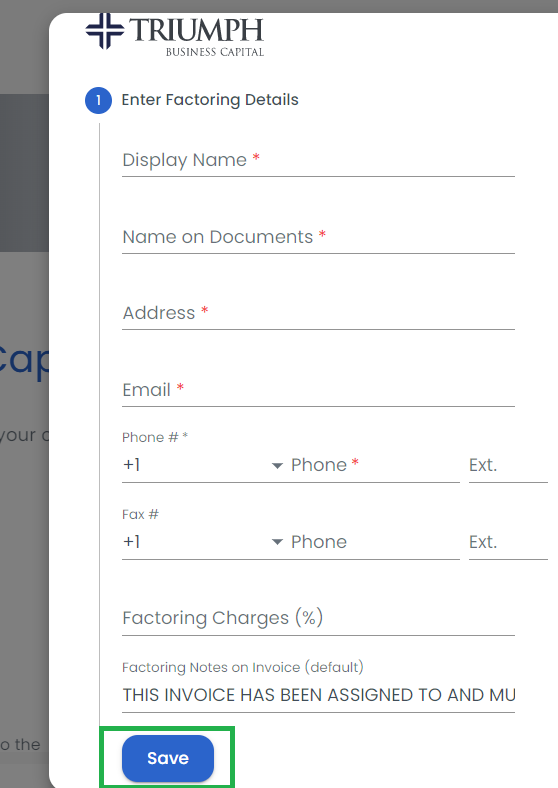
- From within LoadOps, go to Settings ▶️ Integrations ▶️ Finance ▶️ Select Triumph ▶️ click Activate and complete all required fields and click on Save (Note: The Display Name field is the name you would like posted on the integration card once you add this integration and for internal use only. The Name on Documents field is the name you would like posted on any external documents, like the invoice, to be sent to your factoring company.)
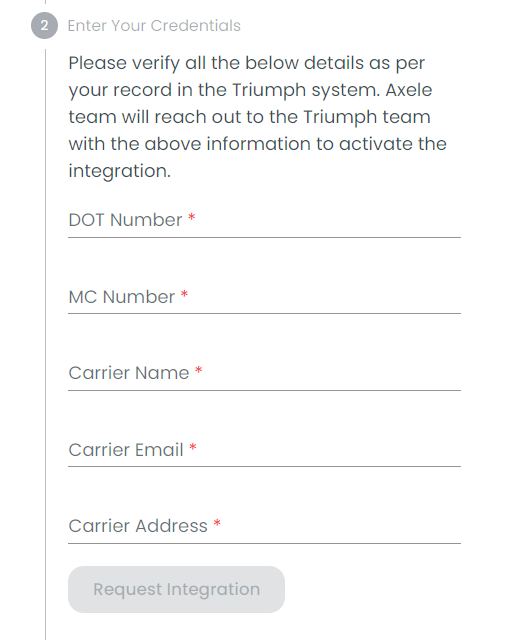
- Enter DOT #, MC #, Carrier Name, Address, and Carrier Email ➡️ Click on Request integration.
(Note: Please verify all the details per your record in the Triumph system. The system will generate an email request for the Triumph team to create a mappable folder on their server. The LoadOps team will use the folder information to activate the integration.) - Once the integration is activated, you will get a confirmation email from Triumph. To verify, please go to Settings ▶️ Integrations ▶️ Finance ▶️ select Triumph under Integration Details; you should see a message stating, "Your Triumph account is successfully integrated with LoadOps. You can start sending your invoices from LoadOps to Triumph now."
The Triumph integration functions by uploading documents to a mapped SFTP folder, therefore it is a one-way communication. Any further updates must be gained from the Triumph web portal directly.