Terminal
Overview of Terminals in LoadOps
Overview
Using this module, you can create terminals within your primary account. This is especially beneficial for carriers that have different branches within their company, different dispatchers that work with a specific set of drivers, or for dispatching services that work with completely different owner-operators with different MC or DOT numbers.
You can consider the Terminal Module as a way to create different accounts or business units under your primary account.
Navigate to Settings ▶️ Preferences ▶️ click the Terminals tab
Setting Up a Terminal
- Go to Settings ➡️ click the Terminals tab (see Image 1 below)
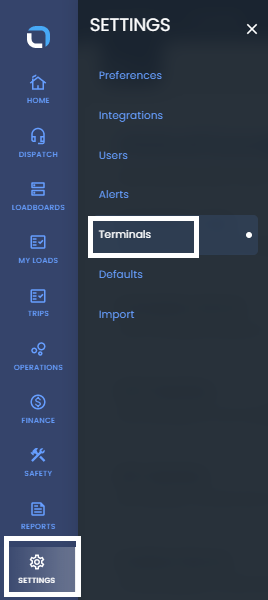
Image - 1
- Click the Add Terminal button at the top right of the page (see Image 2 below) to bring up the Add Terminal form

- Fill out the information within the Add Terminal form (see Image 3 below)
- This is the information that will appear on Load Paperwork, Invoices and Settlements for loads and assets related to that terminal
- Save!
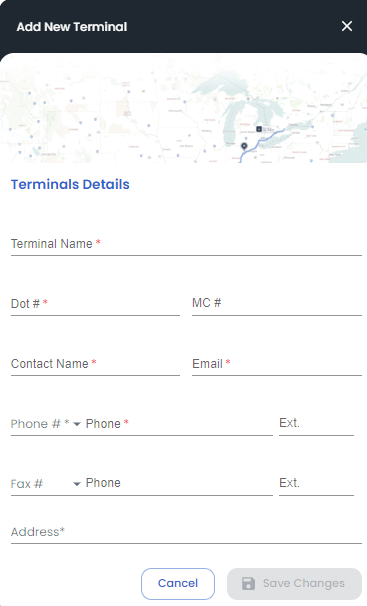
Image- 3
Assigning Equipment and Users to a Terminal
Equipment (Tractors, and Trailers) and Web Users (Dispatchers, Accountants, Drivers, etc.) can be assigned to a terminal. See below for the steps to configure these entities.
Web Users/Drivers: Settings ▶️ Users ▶️ Click on the user name ➡️ In the new window (Right side of the screen), under General tab scroll down to assign the "Terminal" in the primary terminal field ➡️ Save. (Please refer to Image - 4)
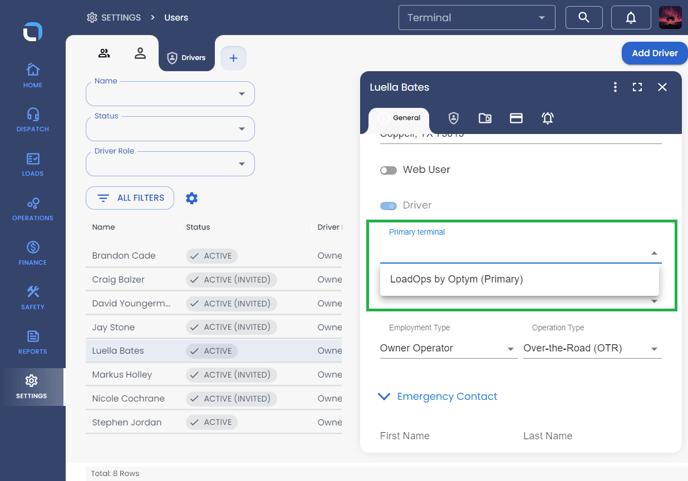
Image - 4
Tractors: Operations ▶️ Equipment ▶️ Select the tractor section ➡️ Click on the tractor number ➡️ In the new window (Right side of the screen), under general tab scroll down to assign the "Terminal" under the terminal tab ➡️ Save (Please refer to Image - 5)
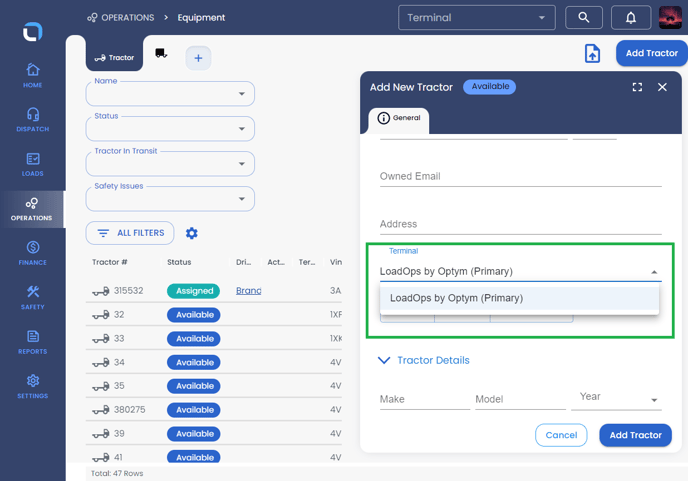
Image - 5
Trailers: Operations ▶️ Equipment ▶️ Select the trailers section ➡️ Click on the tractor number ➡️ In the new window (Right side of the screen), under general tab scroll down to assign the "Terminal" under the terminal tab ➡️ Save (Please refer to Image - 6)
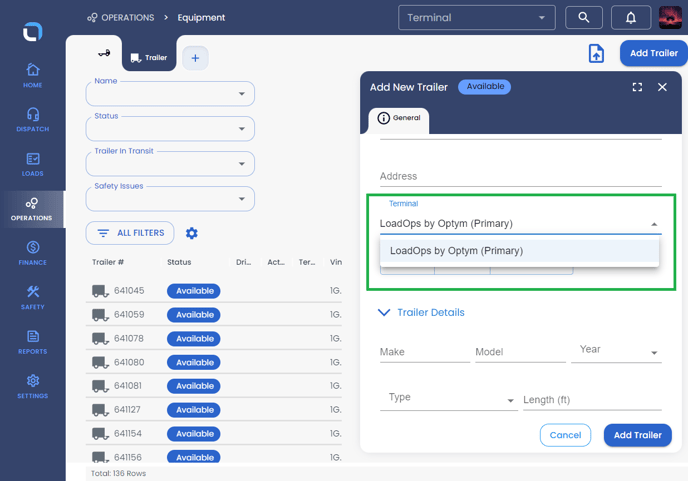 Image - 6
