Vendor Management
Table of contents
Overview
In LoadOps, you can create and utilize vendor profiles as necessary. Vendors are service providers who are not involved in regular operations but are instead used for load assignment exceptions, such as accidents. Examples of vendors include repair shops and tow trucks.
Adding a Vendor
Go to Operations>Contacts>Vendors>Add Vendor to create a new Vendor.
When adding a Vendor you will be able to note the following
- Vendor Name: Name of the Vendor
- Preferred/Prohibited: A thumbs up/down rating can be provided to note the ease of doing business with the Vendor.
- Address: Address of the Vendor.
- Contacts: This includes the name, email address, and phone number.
Follow the below guide to learn how to add Vendors in LoadOps
Vendor Management
Vendor filtering: On the Vendor page, Vendors can be filtered by the options below:
- Vendor name
- Contact
- Address
- Preferred/Prohibited
Learn more about table settings & filters in our help article here.
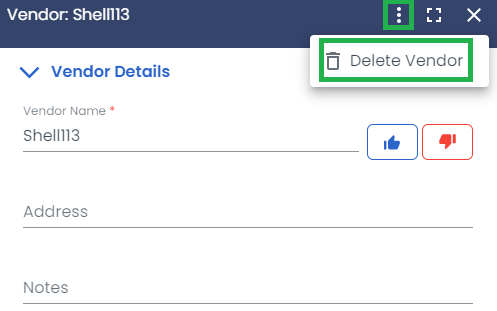
Delete a Vendor: Selecting a vendor opens the vendor panel; from here vendors can be edited and deleted as shown below.

