In this article
Overview
Once a load is completed within LoadOps, there are two automations that occur for that load: 1) an invoice is generated and 2) settlement expenses are calculated, which are based on the the entities associated with the load's payment terms.
We will discuss how to set up driver and tractor payment terms, and what occurs against the load after it is completed.
Workflow On How To Configure the Driver’s Payment Terms
Please follow the link below to view the workflow on How To Configure the Driver’s Payment Terms: Driver Payment Terms
Create and Finalize the Driver Settlement
Please follow the link below to view the workflow on how to create and finalize the driver settlement: Driver Settlement
Looking for driver and tractor settlements? Click here to read the article.
Configure the Driver’s Payment Terms
Please note, you must be an Admin, Accountant, or Power Dispatcher to modify payment terms.
Each driver or tractor can have the same set of terms, or they can be completely different to match the nuances of your network.
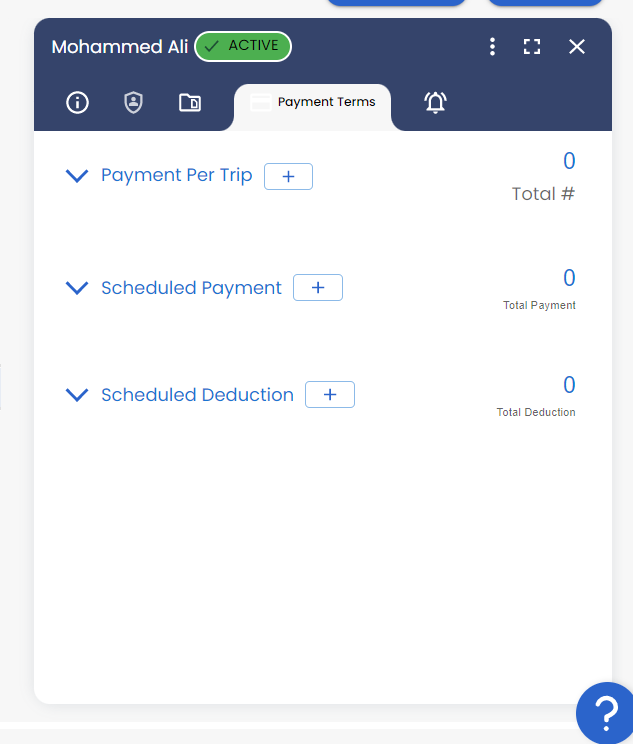
There are three payment term sections that you can modify:
- Payment Per Trip
- Most common
- Examples are revenue share of a load, per mile pay, or items found against an invoice
- Schedule Payment
- Helpful if a driver is paid a certain amount per time period
- Examples are a driver’s weekly or monthly paycheck
- Schedule Deduction
- Used if a driver is paid a specific deduction per time period
- Examples are cell phone reimbursement, child support, insurance, etc.
You can add as many line items to these sections as needed and LoadOps will use them to calculate the settlement for your driver.
To add a component to any of these sections, click the Plus Icon within that particular section. A popup window will appear, which will allow you to configure and add your line item
For example, let’s add Revenue Share within the Payment Per Trip section:
- Go to the Payment Per Trip section, then click Plus Icon
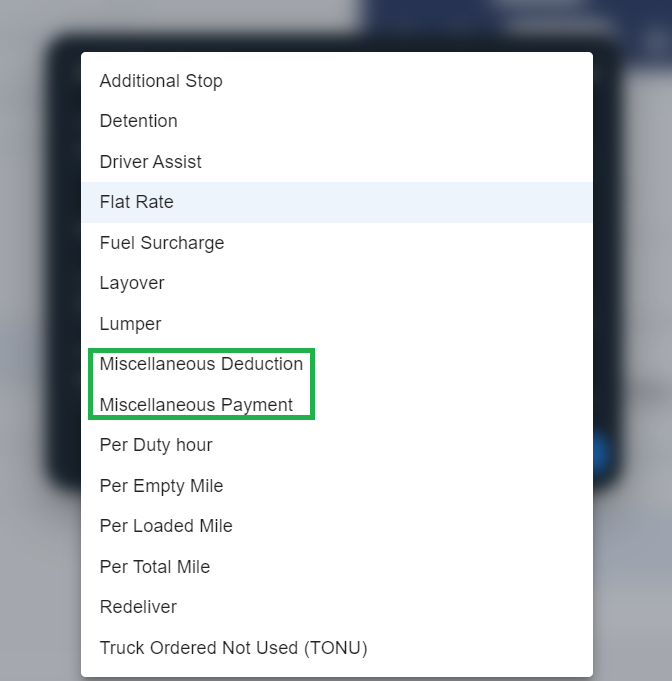
- Click the Pay Type field and select Revenue Share
- Modify the Rate field and any other fields as needed
- Add!
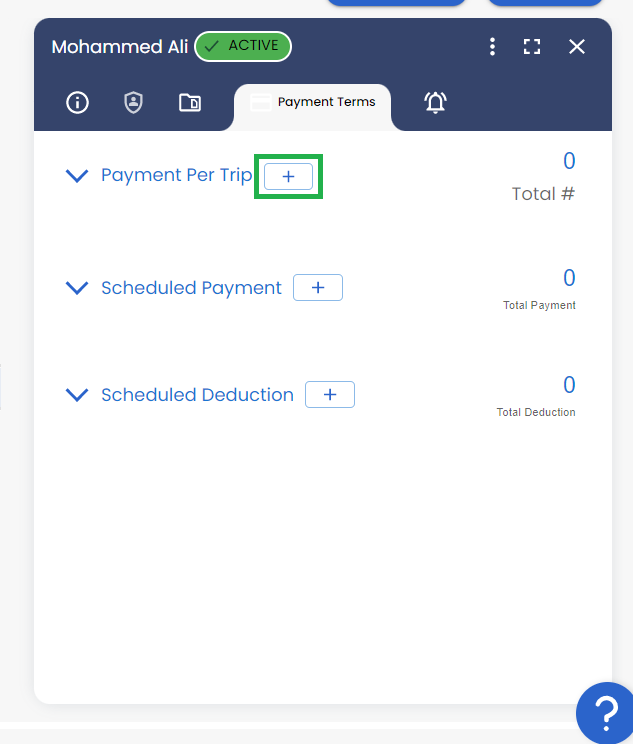
Image-1
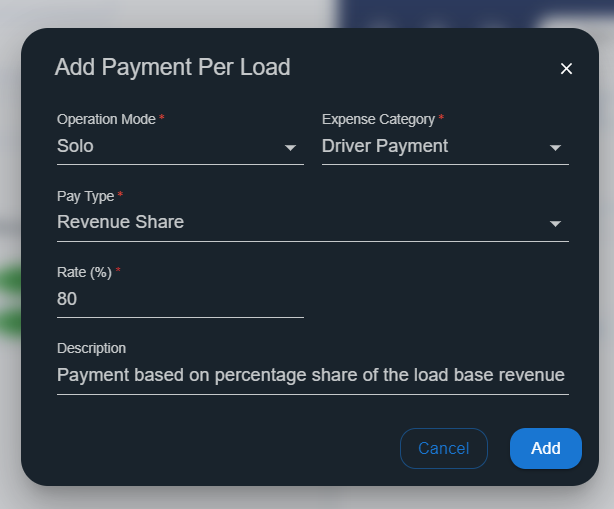
Image-2
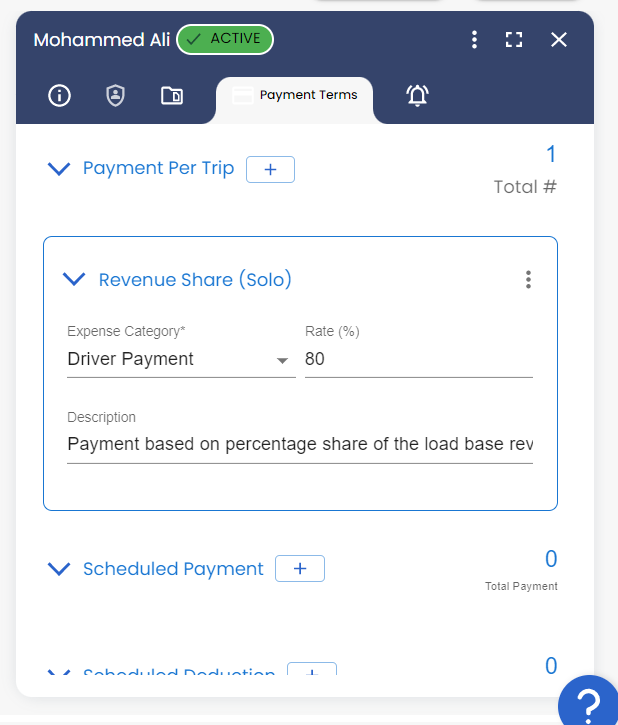
Image-3
Payment Per Trip
Here are the pay types explained.
| Additional stop % | The driver gets paid a percentage share of the additional stop charge on the load |
| Additional stop rate | The driver gets paid based on the additional stops done on the load |
| Detention % | The driver gets paid a percentage share of the detention charge on the load |
| Detention rate | The driver gets paid a detention charge per hour |
| Fuel surcharge | The driver gets paid a percentage share of the fuel surcharge on the load |
| Per duty hour | The driver gets paid per hour for any duty time spent |
| Per empty mile | The driver gets paid based on the empty miles he has driven on the load |
| Per loaded mile | The driver gets paid based on the loaded miles he has driven on the load |
| Per total mile | The driver gets paid based on the total miles he has driven on the load |
| Revenue share | The driver gets paid a percentage share of the load linehaul revenue |
This is used when you need to pay a specific amount on a weekly, biweekly, monthly, or annual basis. To add a line item, click Plus within this section.
Based on your configuration, LoadOps will automatically create the scheduled payment and include it in the pending driver settlement page.
This is used when you need to deduct a specific amount from the driver’s pay on a weekly, biweekly, monthly, or annual basis. For example, payment of a lease, insurance, mobile phone, etc.
You can configure these scheduled deductions for your driver by clicking Plus icon within this section.
Based on your configuration, LoadOps will automatically create the scheduled deduction and include it in the pending driver settlement page
Here is an example of a $200 weekly insurance scheduled deduction, that occurs each Monday, starting on 12/26/2022
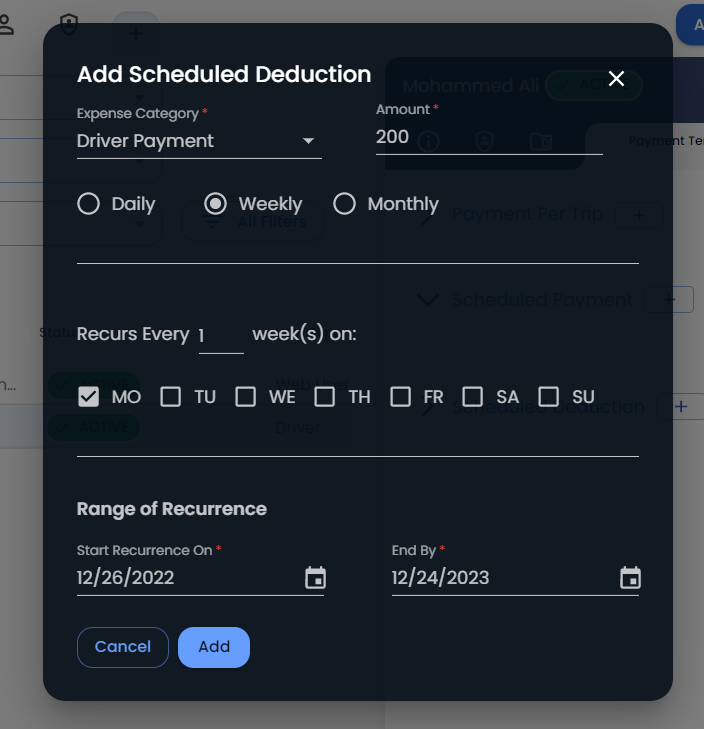
Image-4
Learn more about how we automatically calculate a driver’s payment for a load in Step 2.
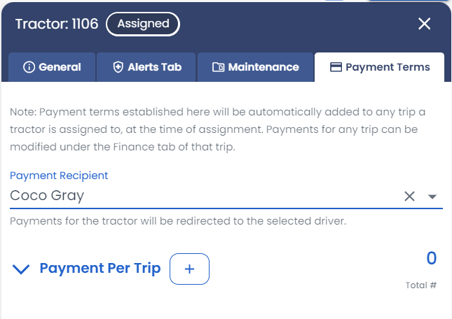
Tractor Payments for Owner Operators
LoadOps allows you to setup tractor payments that are linked directly to the owner of the tractor. This can be especially helpful if an Owner Operator is allowing their tractor to be used by other drivers within the company with slip-seating operations. When viewing the payment terms tab on the tractor level, you can select the payment recipient at the very top of the panel as shown below.
Automatic Calculation of Driver Payment for a Load
Once the load is completed, LoadOps automatically calculates the load settlement expense for the driver based on the configurations in Step 1.
Follow these steps to verify the settlement expense for a given load:
Go to Loads ➡️ select a load ➡️ click the Financials tab and under Trip-1, you can find the Driver Settlement Expenses.
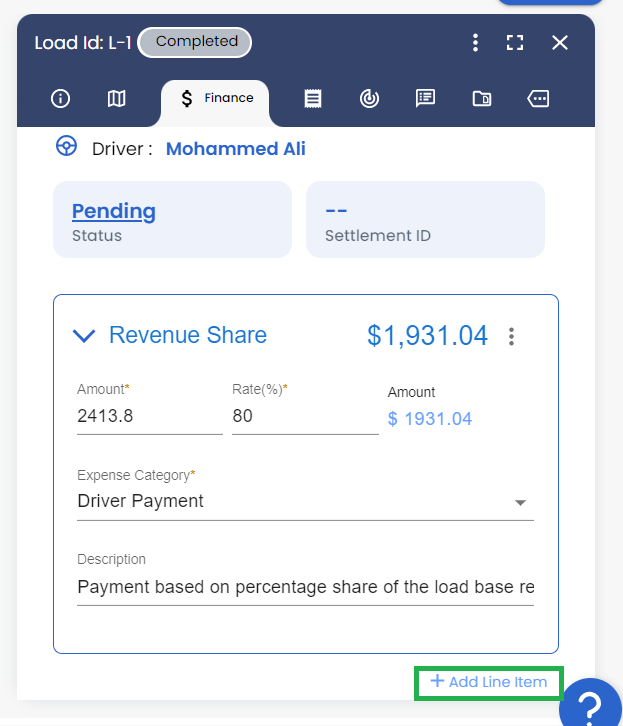
Image-5
You can always modify the settlement expenses for a load by clicking on the driver and editing any existing pay items or clicking on Add Line Item and adding a new expense item for the driver
You can also modify the invoice line items for the load. If you want to reflect any changes on the invoice after the driver settlement expenses have been calculated, click the Recalculate icon as shown below. This will pull in any new data and recalculate the expenses section for you.
Note: If there are no expenses within this section, it may be because the driver does not have any Payment Terms set up yet. If this is the case, add the Payment Terms for the driver, then go back into the load and click the Recalculate icon. This will pull in the configurations as discussed in Step 1.
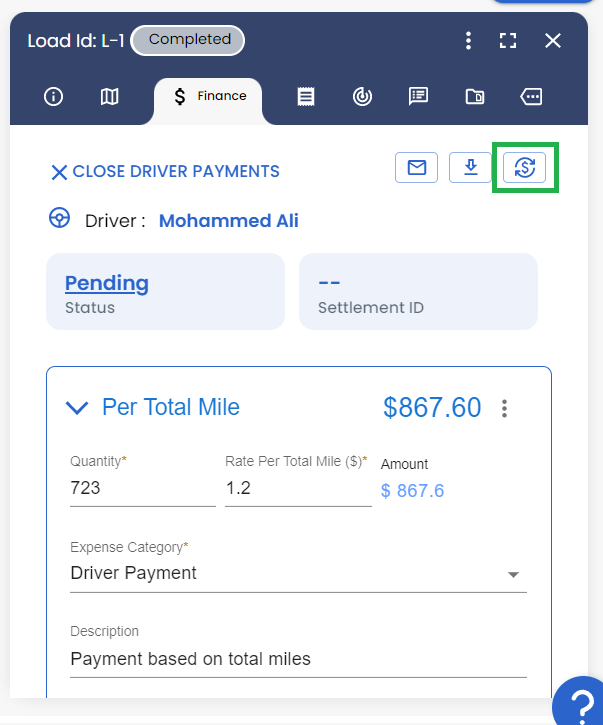
Image-6
To add driver deductions and payments for expenses like tolls, food, etc., click on Add Line Item and select the appropriate pay item as shown below.
Note: You can modify the automatically calculated expenses, or add new expenses, using the Add Line Item option under Settlement Expenses. Clicking on the Recalculate icon will erase your modifications and recalculate your expenses based on the configurations in Step 1.