
Table of Contents
Overview
In LoadOps, completed loads will appear under the invoice page under "Ready to Invoice". Selecting an invoice will bring up the load detail panel with the invoice tab open. Learn how to manage invoices from the load detail panel here.
Invoice Page View
The Invoice page houses all invoices and can be found under Finance ▶️ Invoices.
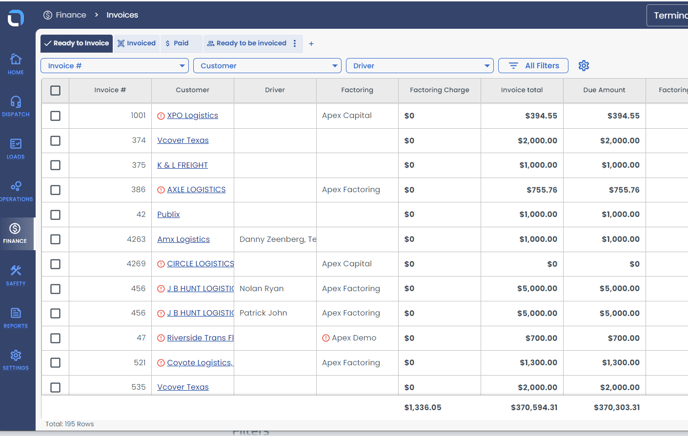
The invoice page is organized into three tabs, each representing a different view. These views are displayed as tabs on the Invoice page, making it easy to navigate and access the desired information.
Ready to Invoiced: After a Load is completed, it will be displayed on the invoice page under the section labeled "Ready to Invoice." You can select the invoices to perform bulk actions like- Email, Factoring Action, Change Status, and Download.
Invoiced: This tab shows all the load which has been Invoiced. You can select the invoices to perform bulk actions like- Email, Factoring Action, Change Status, and Download.
Here, you can change the load status from Invoiced to Revert to Completed and Paid.
Paid: This tab shows all the load which is in Paid status. You can select the invoices to perform bulk actions like- Email, Factoring Action, Change Status, and Download.
Here, you can change the load status from Paid to Revert to Invoiced.
Custom View: A Custom View can be created by setting specific filters and selecting columns.
Click on "+">Create View>Add a Name of the view>Pick the data>Add the Filters>Save View
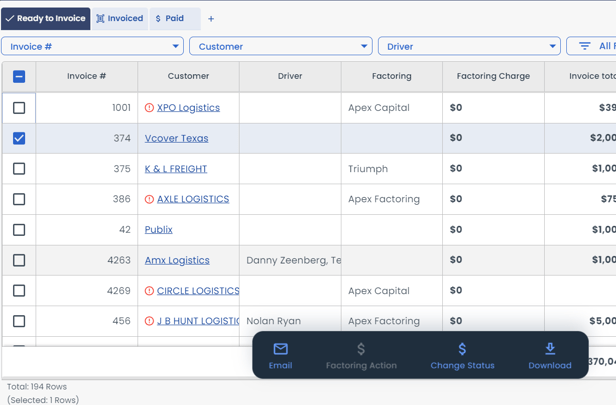
Bulk Actions:
Selecting multiple invoices will bring up the bulk actions menu. The following actions will be available:
Email: You can email the invoice along with the attachments and mark the Load status as Invoiced
Factoring Action: It allows you to send the invoices to the Factoring company.
Change Status: It allows you to change the Invoice status from:
Ready to Invoic to Invoiced.
Invoiced to Revert to completed or Paid
Paid to Revert to Invoiced
Download: Users have the option to select invoices and click on the Download button. This will open a pop-up window where users can choose which documents they want to download, such as Rate Confirmation, Bill of Lading, Proof of Delivery, and more. Users can select or deselect these documents based on their specific needs.
Factoring Action: This option is available for TAFS, OTR Solutions, Triumph, and RTS. However, for APex and Other Factoring, this option will be disabled or grayed out. In addition, if there is any warning signal associated with the customer or Factoring company name, this option will also be disabled or grayed out.
Filters
Select "All Filters" to adjust which Invoices will populate the table.
Invoices can be filtered based on the data below:
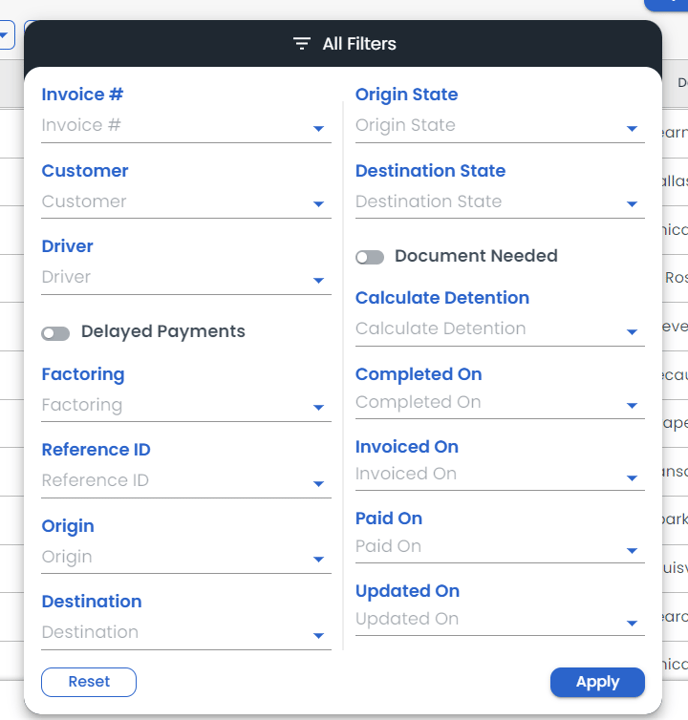
Table settings
The following columns can be hidden or shown using the table settings.
| Customer | Driver | Factoring | Invoice # | Invoice Total |
| Due Amount | Factoring Status | Origin | Destination | Missing Docs |
| Ref # | Terminal | Invoice Status | Completed On | Updated On |
| Invoiced On | Paid On | Internal Invoice Notes | Factoring Charges |
Export Invoice data by going to Table Settings>Download Table Data.
Sync with Quickbooks
From the invoices page users have the ability to send invoices from their terminals to QuickBooks, which allows for the consolidation of all financial data into one accounting application.
To use QB sync click on Send to QuickBooks>> Select the name of the account>> Select non-synced invoices>>Send to QuickBooks to sync the invoices to QB.
A user can perform the below action with the help of QuickBooks:
Map pay items in LoadOps with ITEMS in the QuickBooks account.
Send customers from Loadops to the QuickBooks account.
Send Invoices of their terminals to the QuickBooks account.
Get the payment status of Invoices of their terminal from QuickBooks and update in LoadOps.
You must sync a customer with QB before you can send an invoice related to that customer to QB. Learn how to set up a QB integration here.